
⎨Simple, inexpensive, eco-friendly, different, beautiful!⎬
I made my first Christmas crackers in 2012. Before and after then, there have been store- bought crackers on my table. And I’ll tell you how it went.
Either I was disappointed for the gifts inside, or somebody else was disappointed for the gift inside (there is generally a lot of junk in there- sorry cracker manufacturers, but it’s true). Said gifts inside, almost always made of plastic, ended up in the bin (and filling the landfill afterwards!). The paper crowns were ridiculously cheap and the colors not coordinated with my tablescape, despite the cost (not so cheap!) of the sets. I usually tend to buy the most beautiful crackers I can find, I don’t mind if they cost more… but I want everyone to be happy with them- especially myself. The jokes inside… well, not for me… maybe it’s because it’s British humor, I don’t know (… because really, I adore the quintessentially British humor of Mr Bean!!)… but they don’t resonate with me (or any of my guests and family, really).
The one and only pleasant things about store bought crackers is that they pop, and that the colors are beautiful.
Well, this year I decided to be back to my homemade ones. They won’t pop, but I love them so much that I don’t mind…
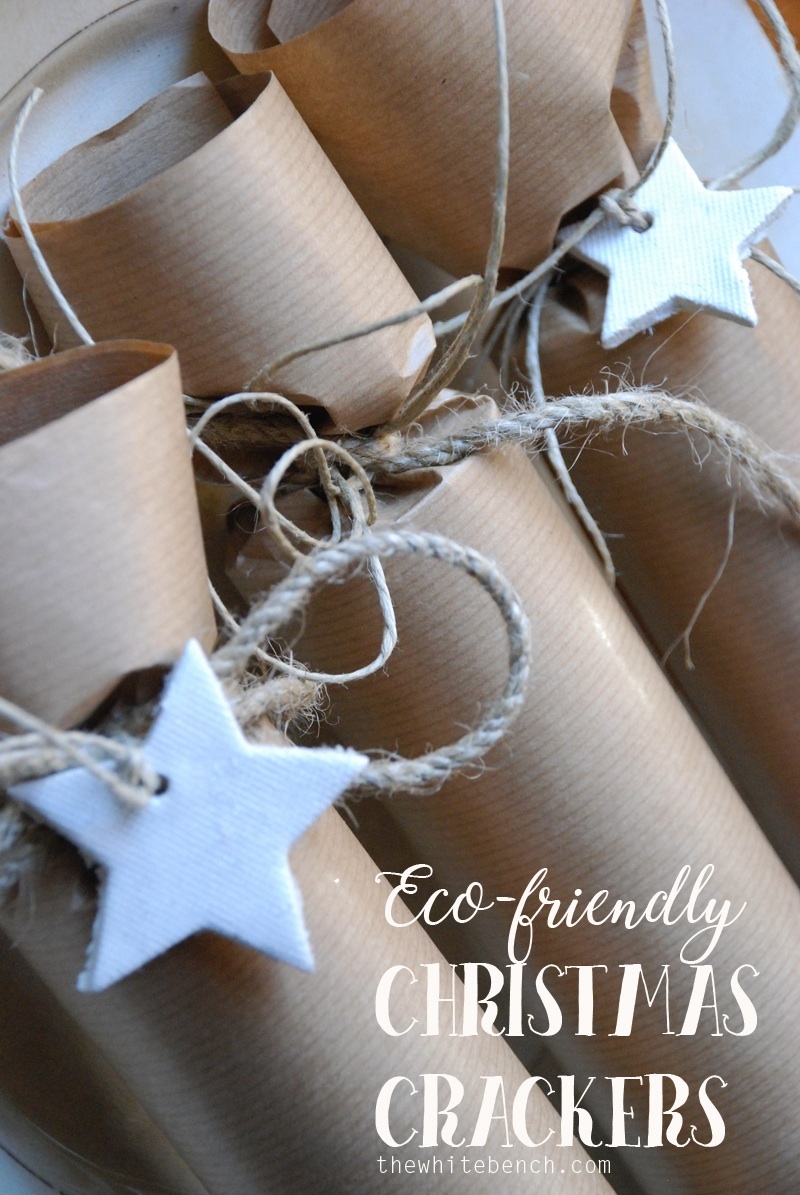
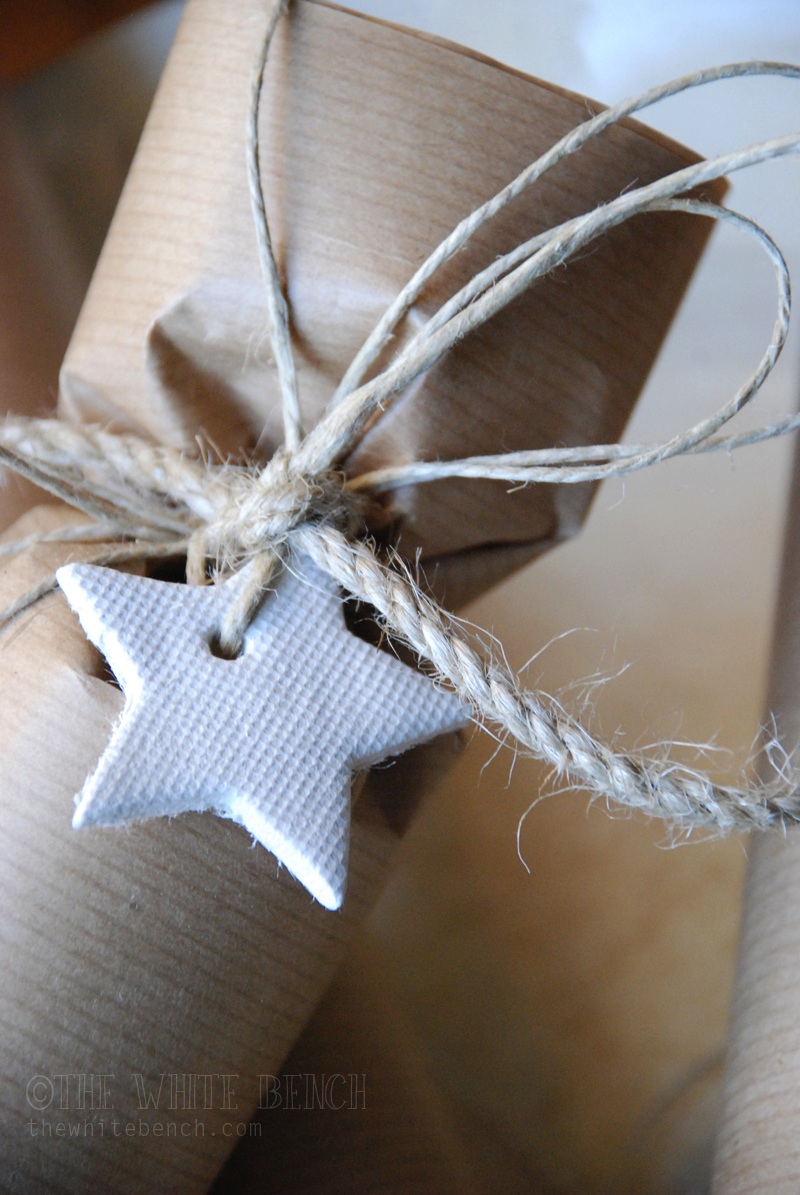
For the ones I’m showing in this post, from some Christmases ago, I kept the design very simple and natural, using kraft paper and twine (two of my favorite supplies ever!). I mixed up different types of twine to make them interesting, and added cute handmade clay star sprinkled with clear glitter. I will show you how to make them soon in another post.
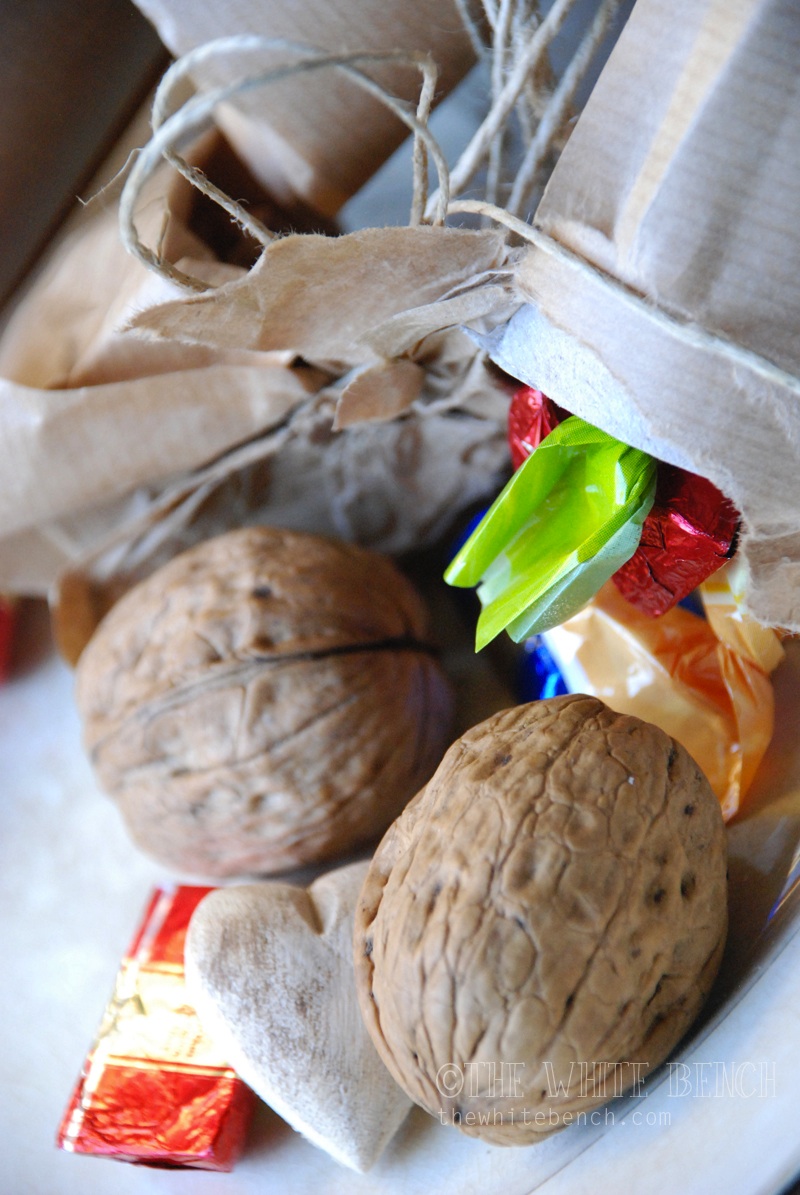
Each cardboard roll was filled with treats, a wooden heart and a wish ticket, instead of the usual small gift and joke.
As for the paper crowns, I don’t mind either, because I have made our fabric crowns, that are stunning and special (I will show them to you in another post of this series), so we don’t need paper ones inside the crackers. But if you want, you can easily make them with tissue paper.
Tools & Supplies
– cardboard rolls ( toilet paper or kitchen paper)
– kraft paper
– twine
– handmade clay stars or other little embellishments
– wish tickets
– nuts and chocolates or any treat
– a little (or not so little!) gift
– scissors
Instructions
1. Measure the length of the roll, and add about 5- 7 centimeters on each side. Be sure the paper will cover the whole roll when you wrap it, before cutting it.
2. Fill the roll with treats, the wish ticket, and gift.
3. Wrap in kraft paper, placing it well centered, so that you have 5-7 cm. on both sides.
4. Use a little piece of (paper better than plastic!) adhesive under the kraft paper to keep it in place while you’re securing it on both sides with twine.
5. Make bows and attach the little ornaments or stars on one side of the crackers or both sides if you prefer.
I can’t wait to make some for our home!
Hope you’ll have a wonderful time making these,
Monica xoxo
0 Comments