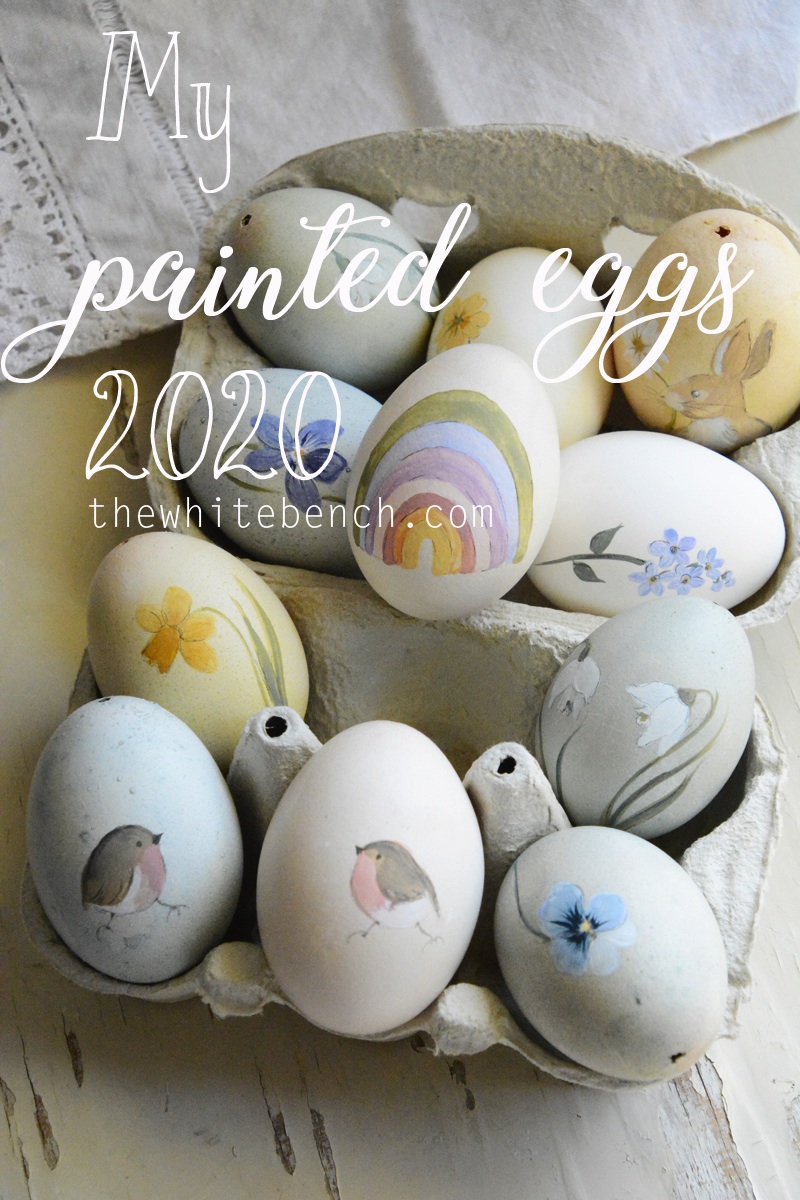
I Couldn't Help Adding a Little Rainbow
And finally, it happened!
After way too many years without emptying eggs and painting them, I wanted to do it again!
I grew up doing this simple craft often with my Nonna, but then life got in the way. As an adult, I remember doing it a few times ( I used to have other ornaments for my Easter tree!), certainly not as much as I would have loved.
But this year, I was determined to make it happen!
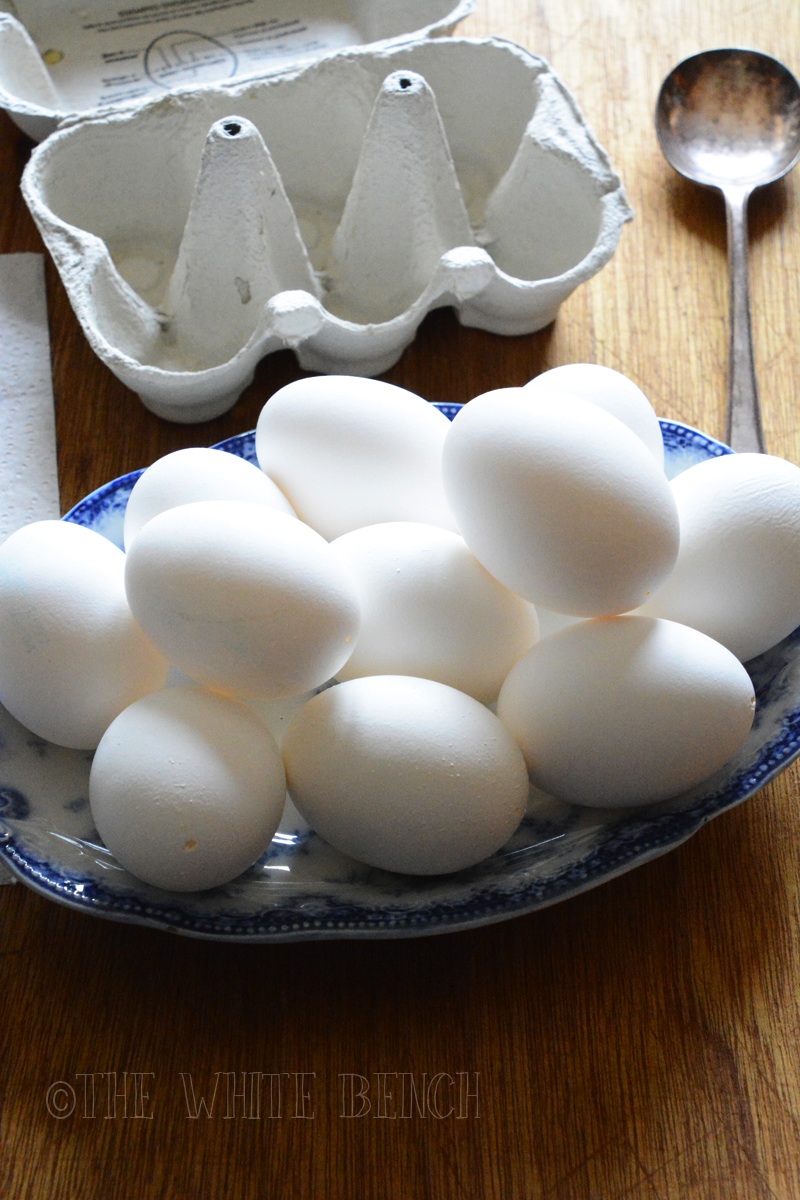
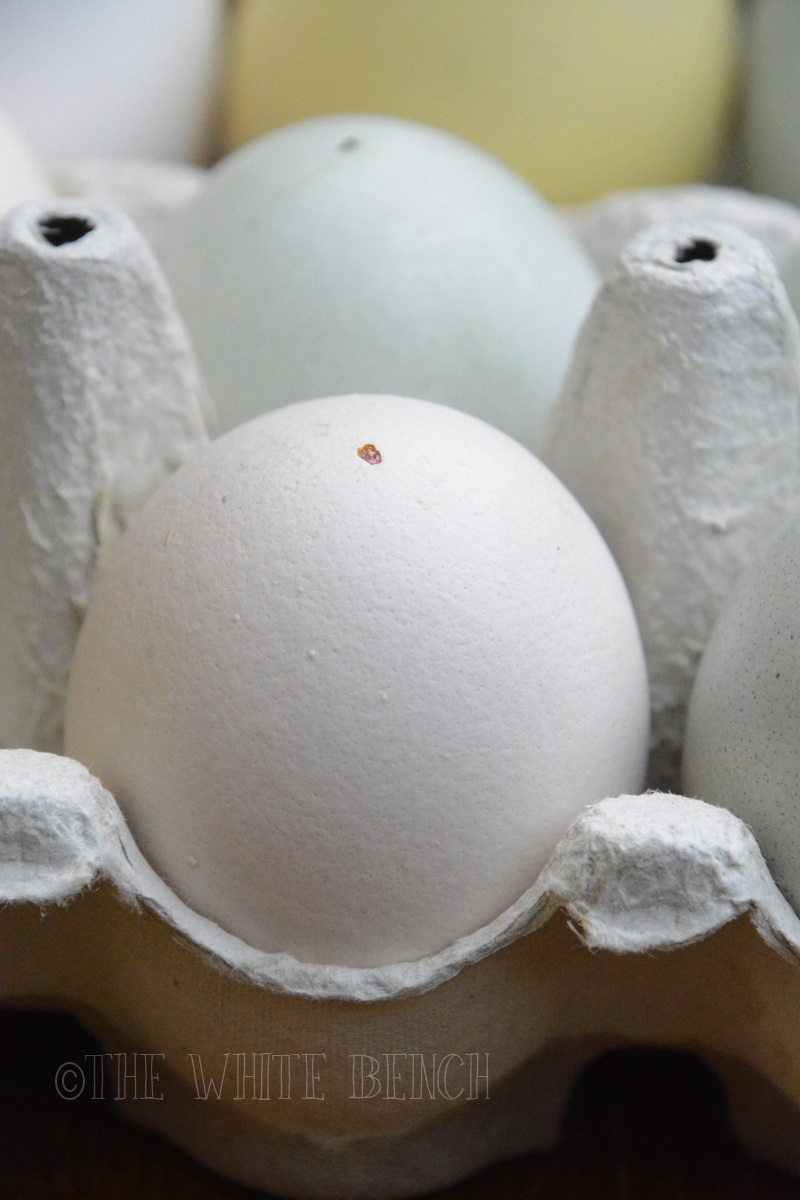
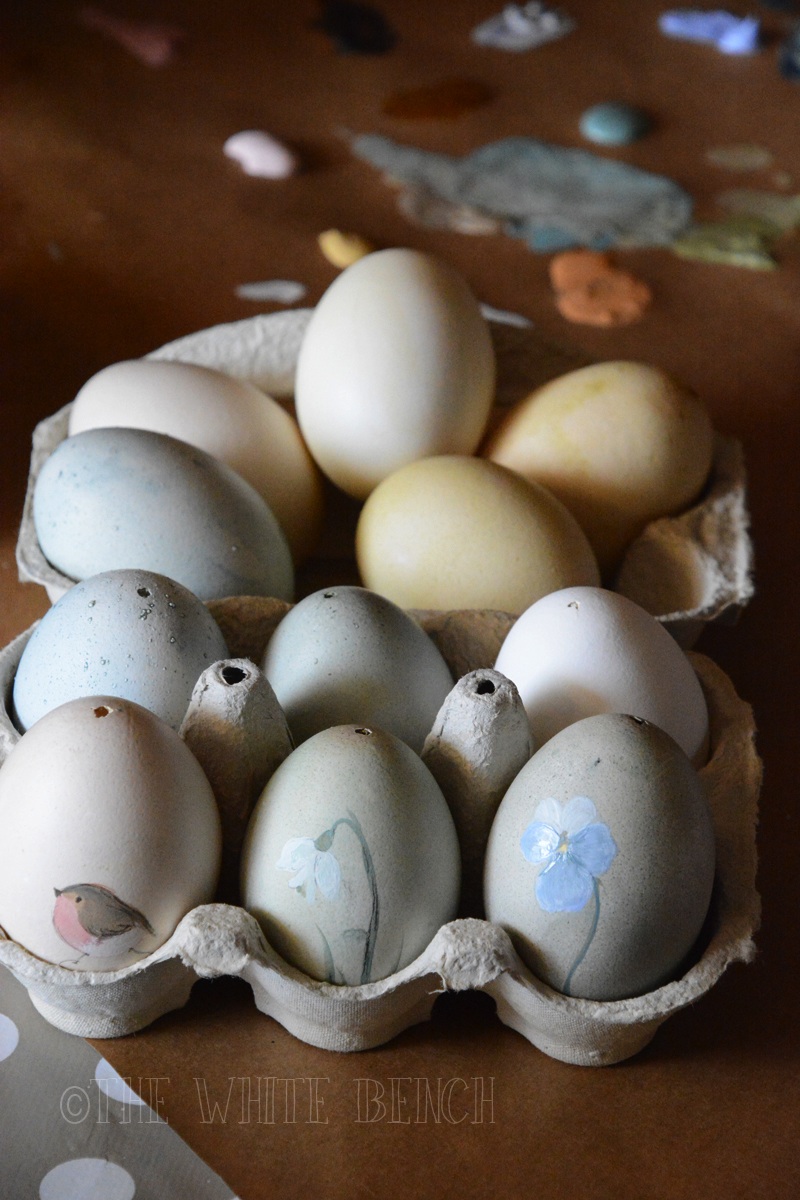
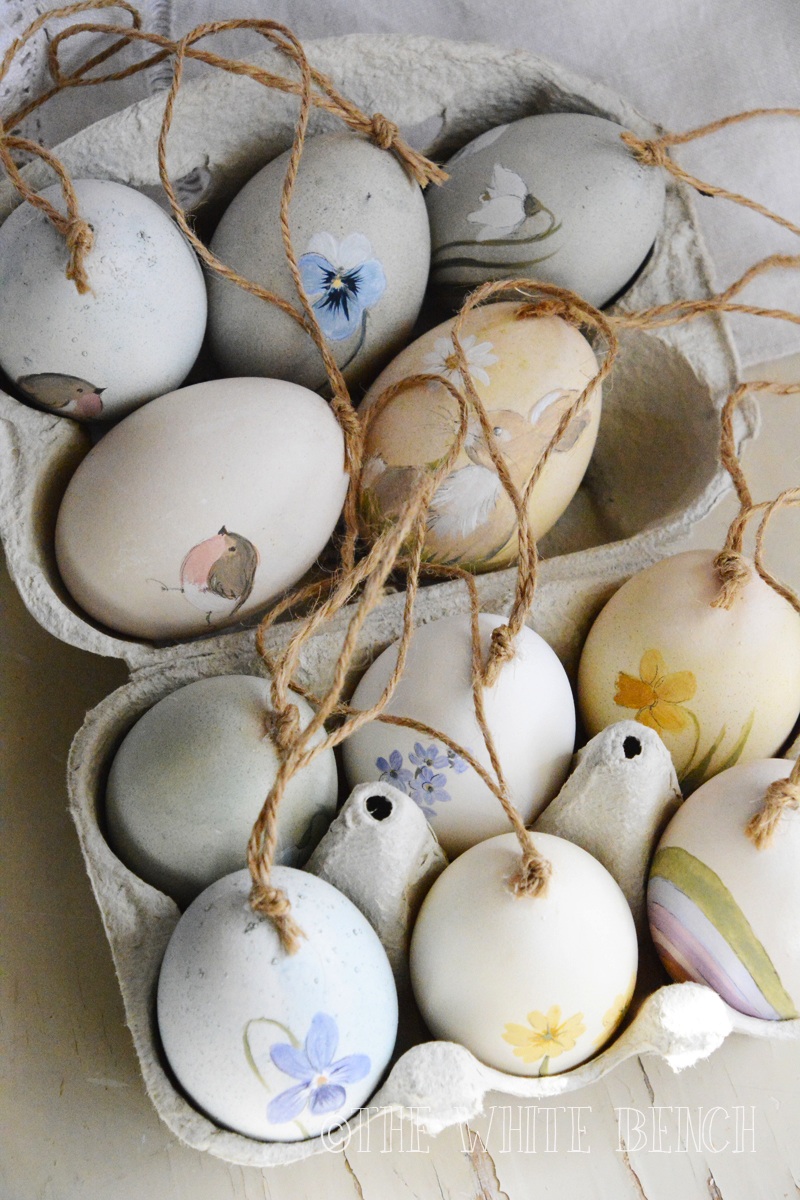
In the past, I’ve always used normal eggs. Honestly, I had never seen a white egg before moving to England! But this time, I got white eggs, thinking that it would have been simpler to start with a white background.
I then dyed the eggs with natural ingredients I had at home. This part was an experiment, that I really enjoyed!
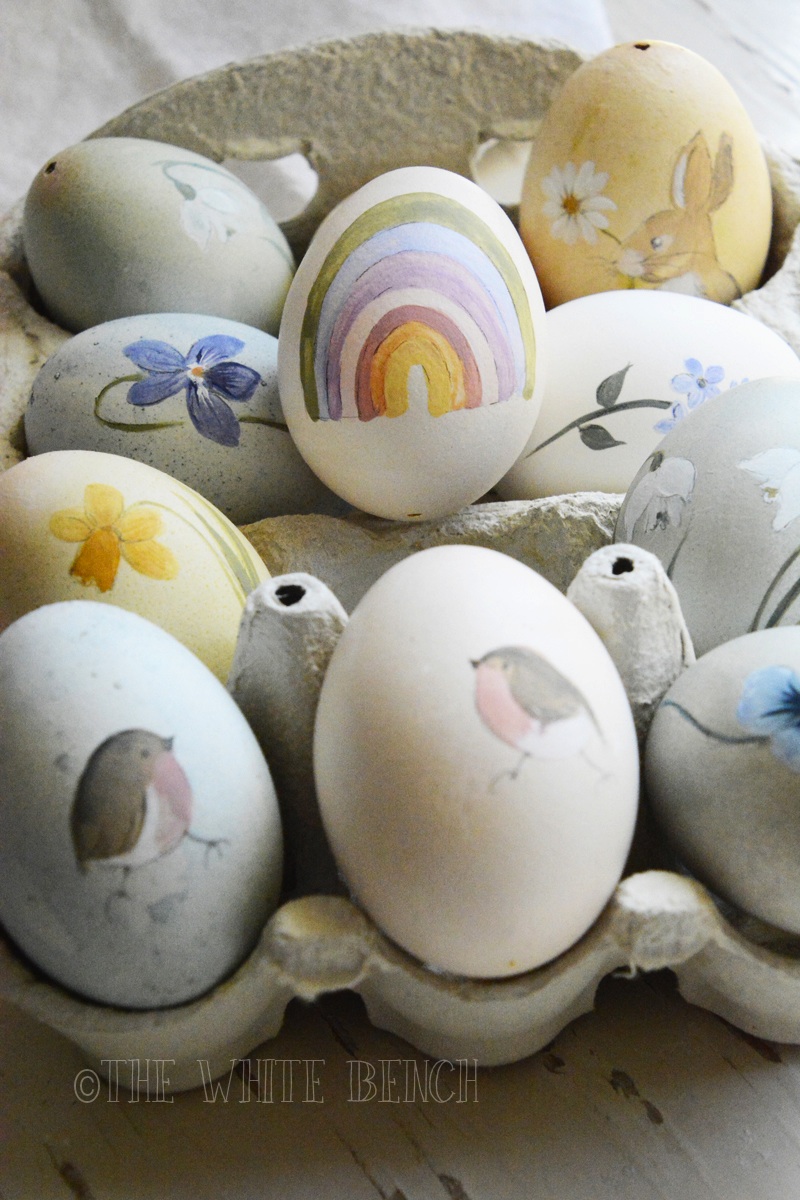
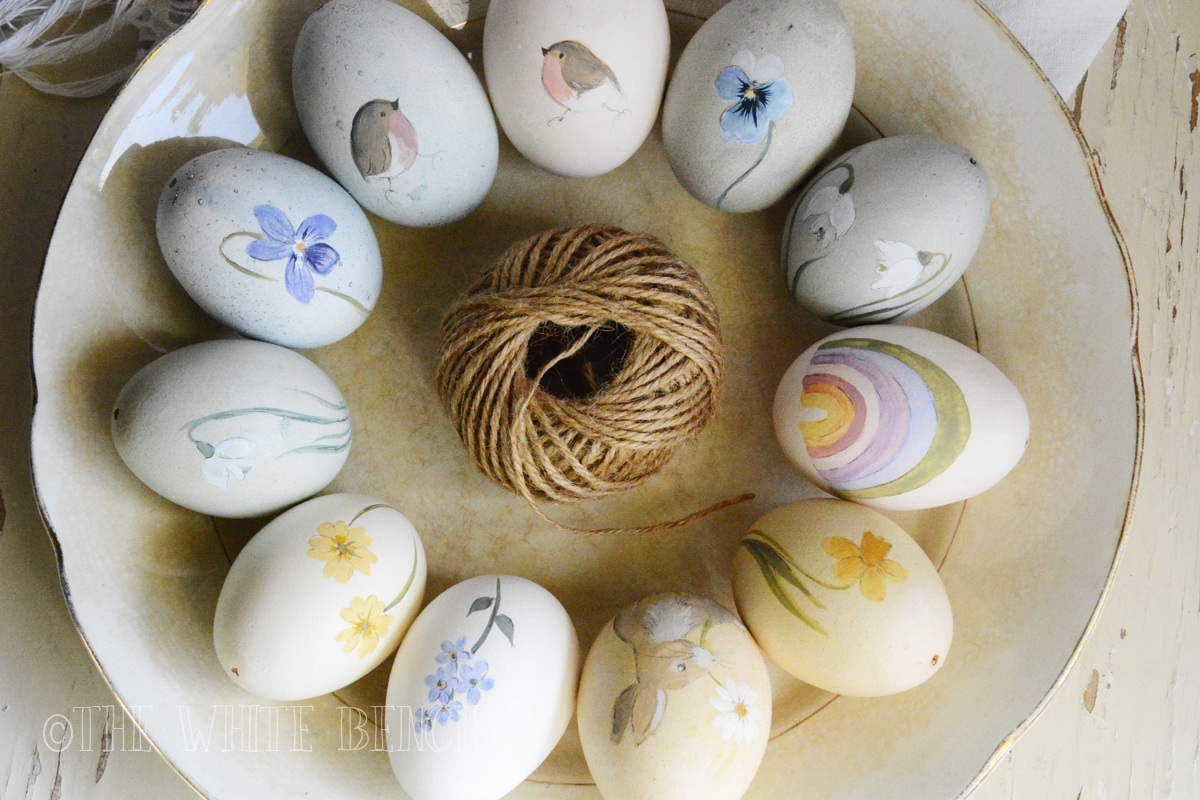
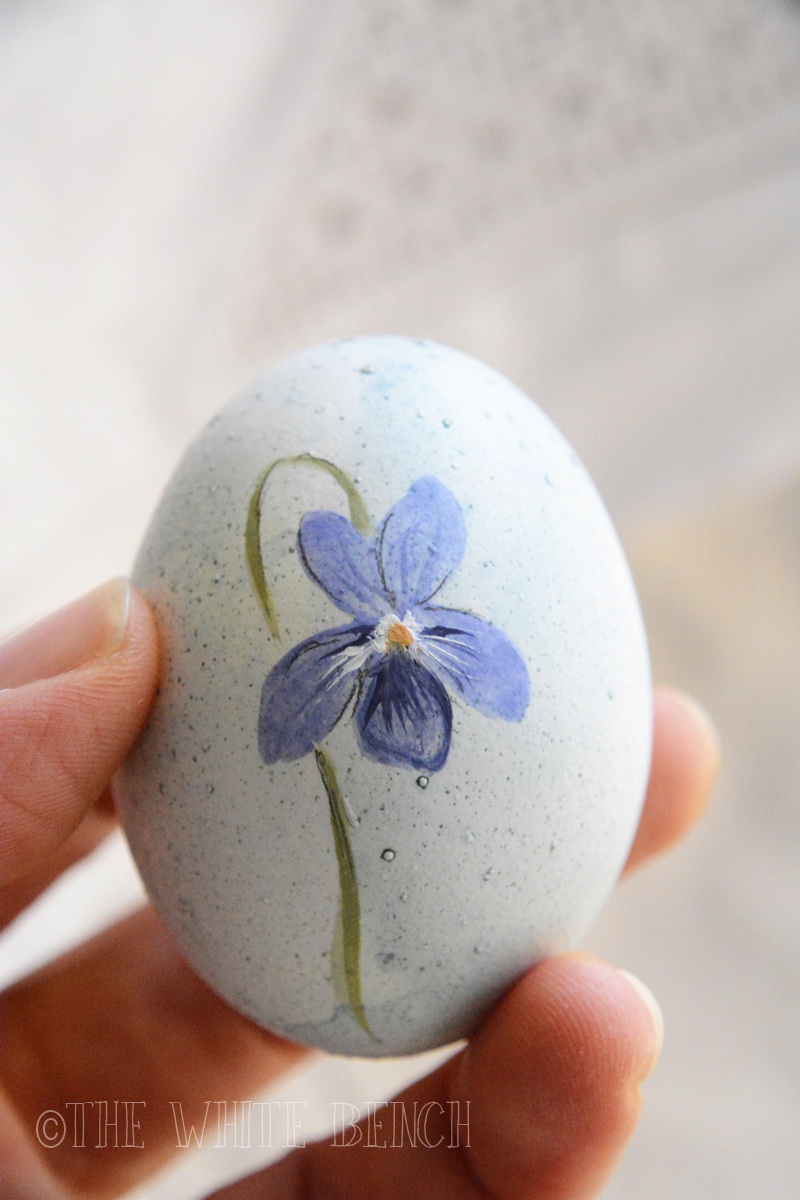
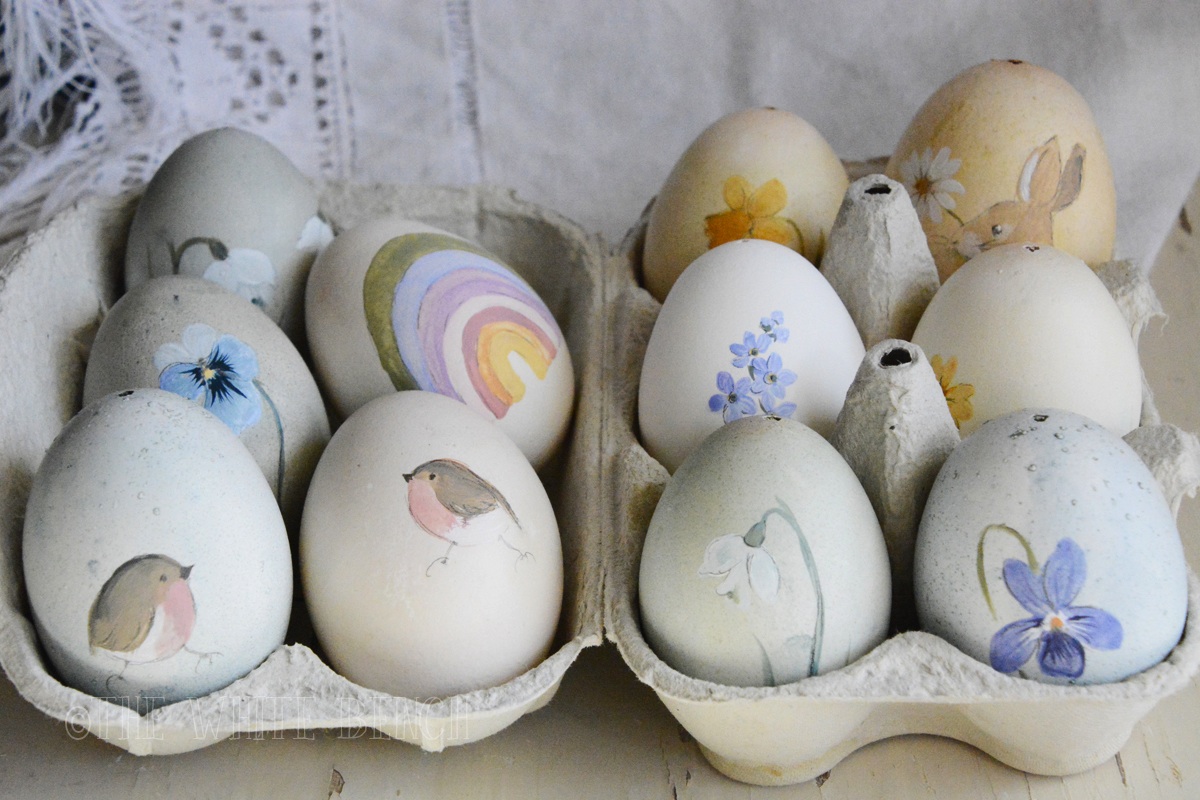
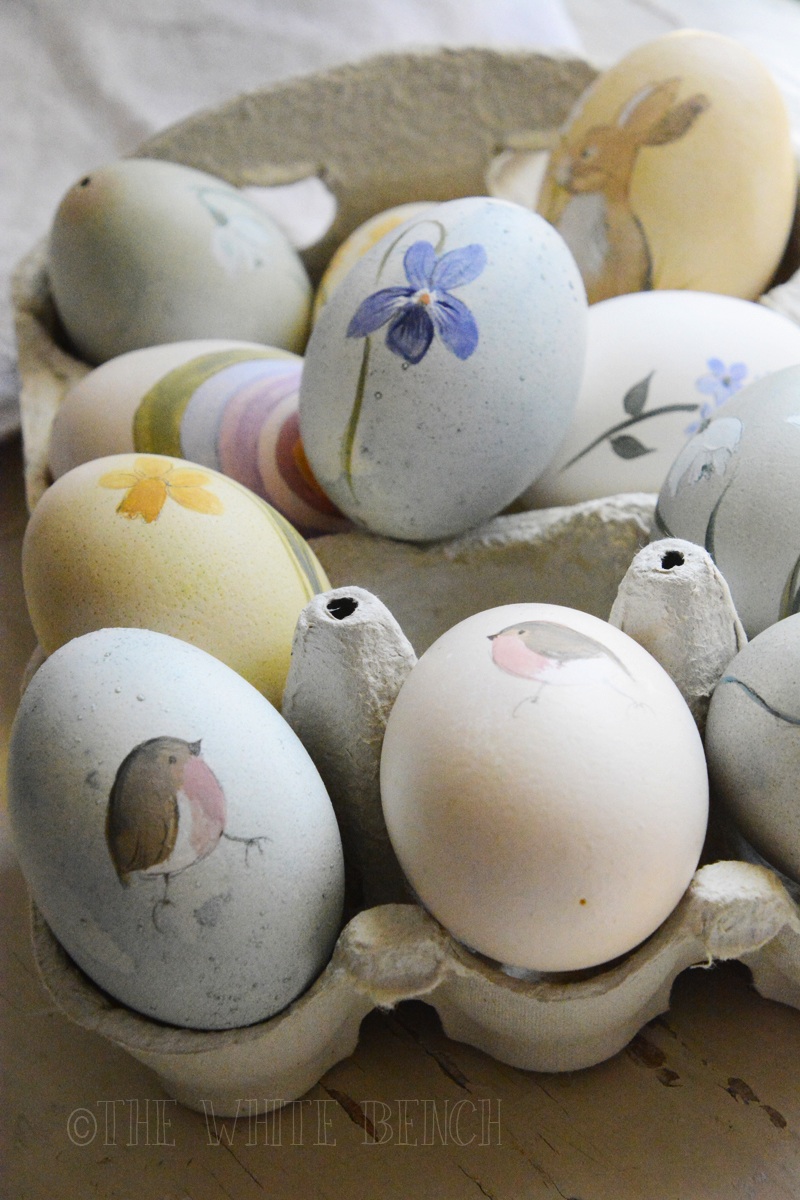
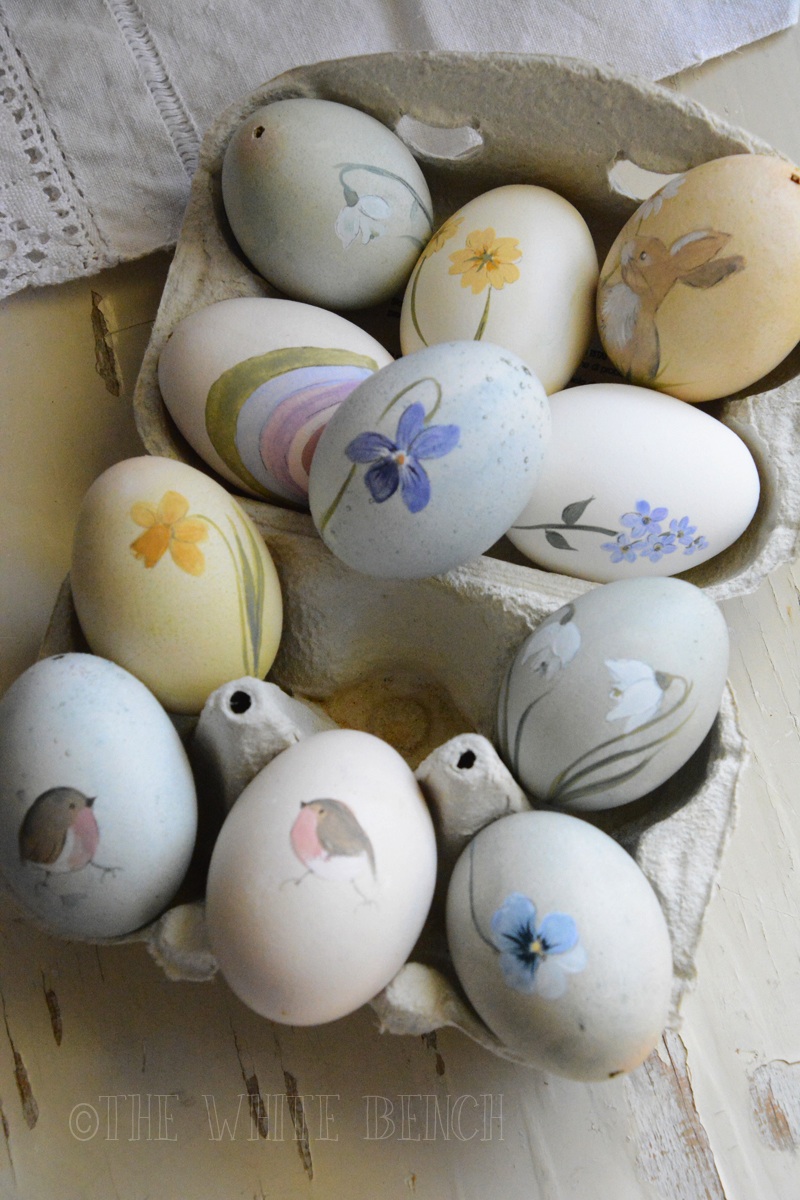
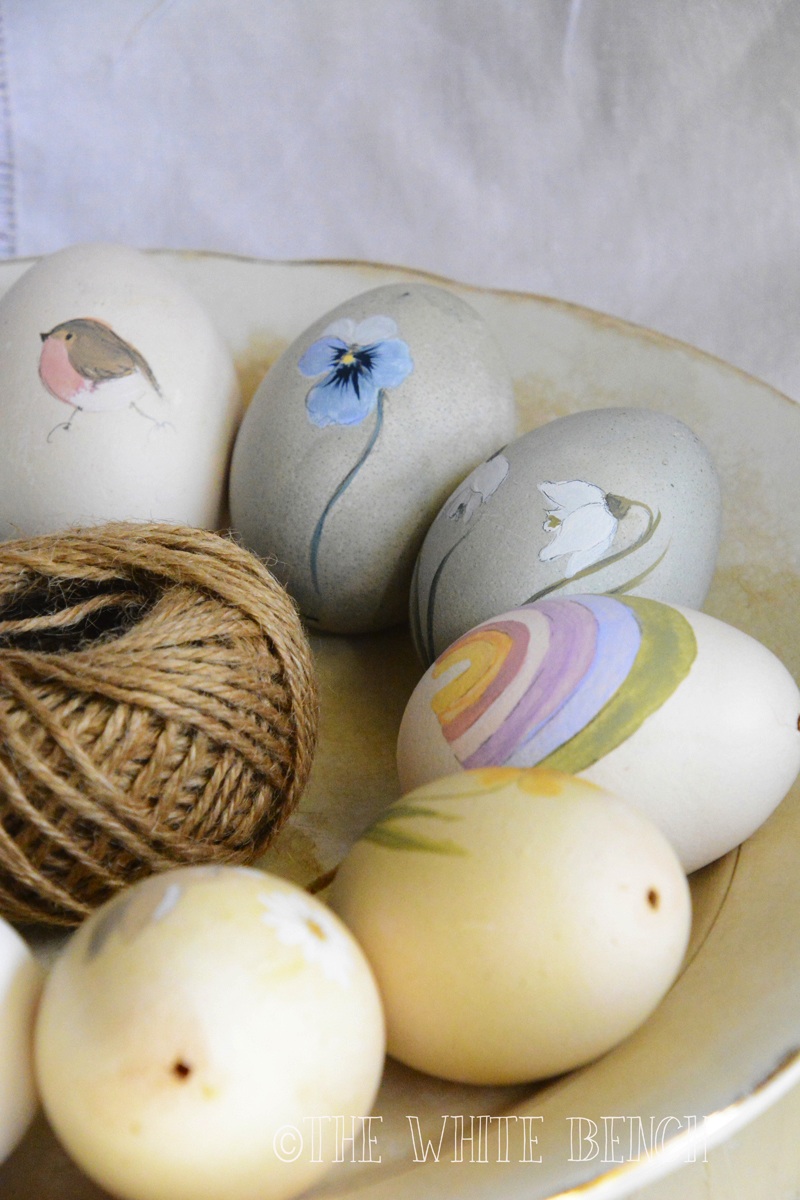
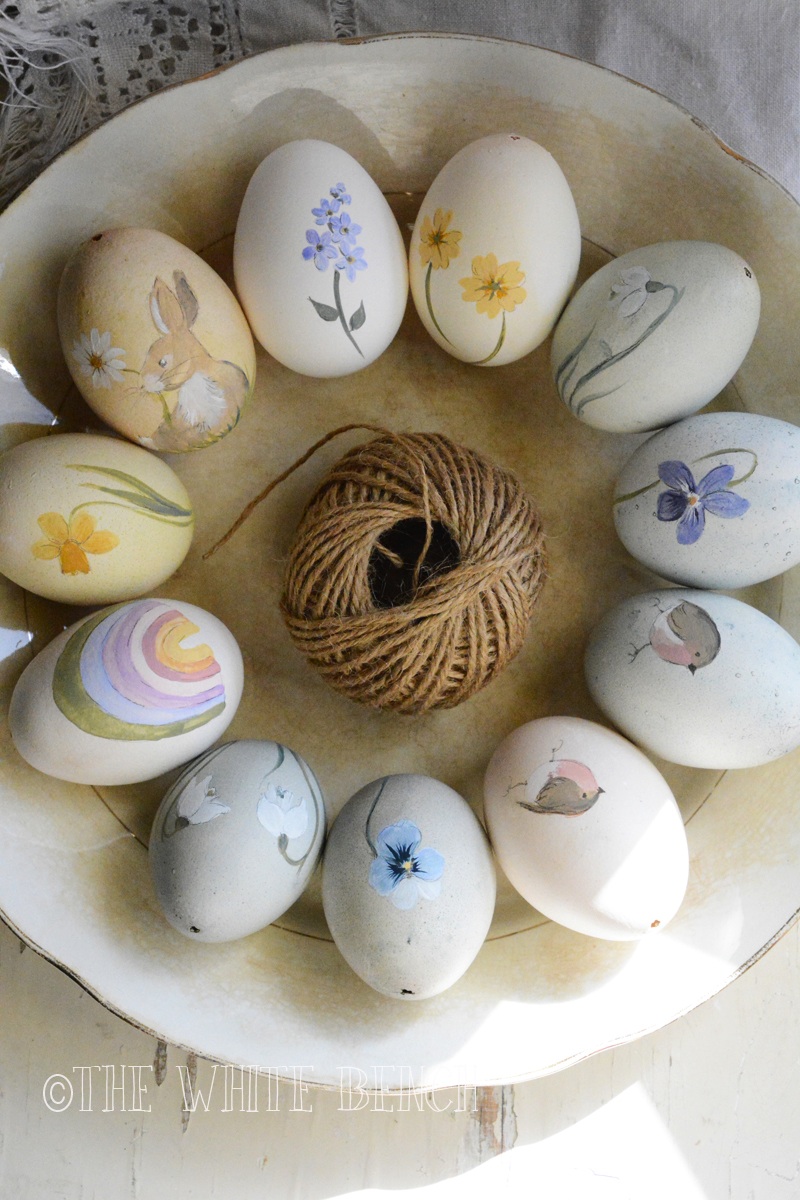
I was after a look with very muted colors, and when it was time to paint my eggs, I spontaneously decided for sweet designs that resembled my own watercolors in my sketchbooks. My little paintings ended up portraying all the flowers that have made me happy during the past weeks and months, and the flowers on my balcony!
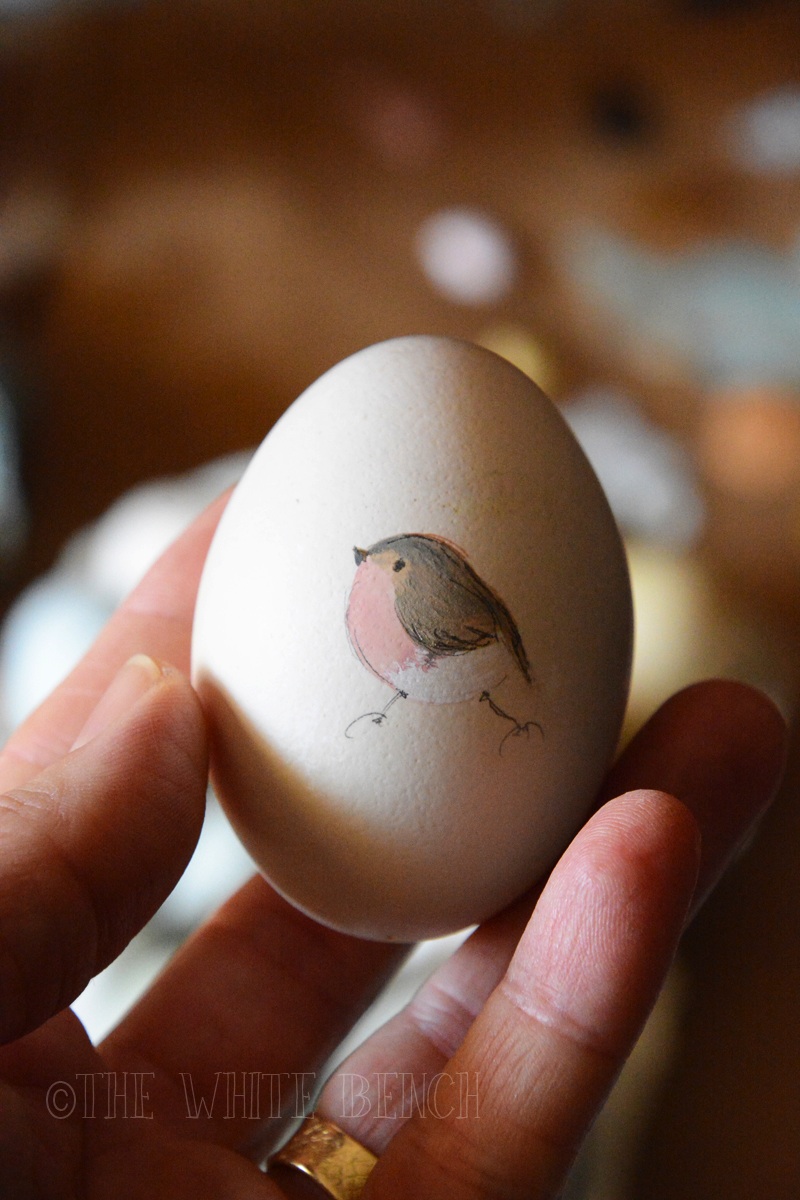
And the robin, of course, that is a constant companion in my life, and I adore. I had one in my Italian garden many years ago, a sweet couple in my English garden, and recently I have noticed a resident robin in my container garden, right in front of my art table. He sings me serenades… How cool is that?
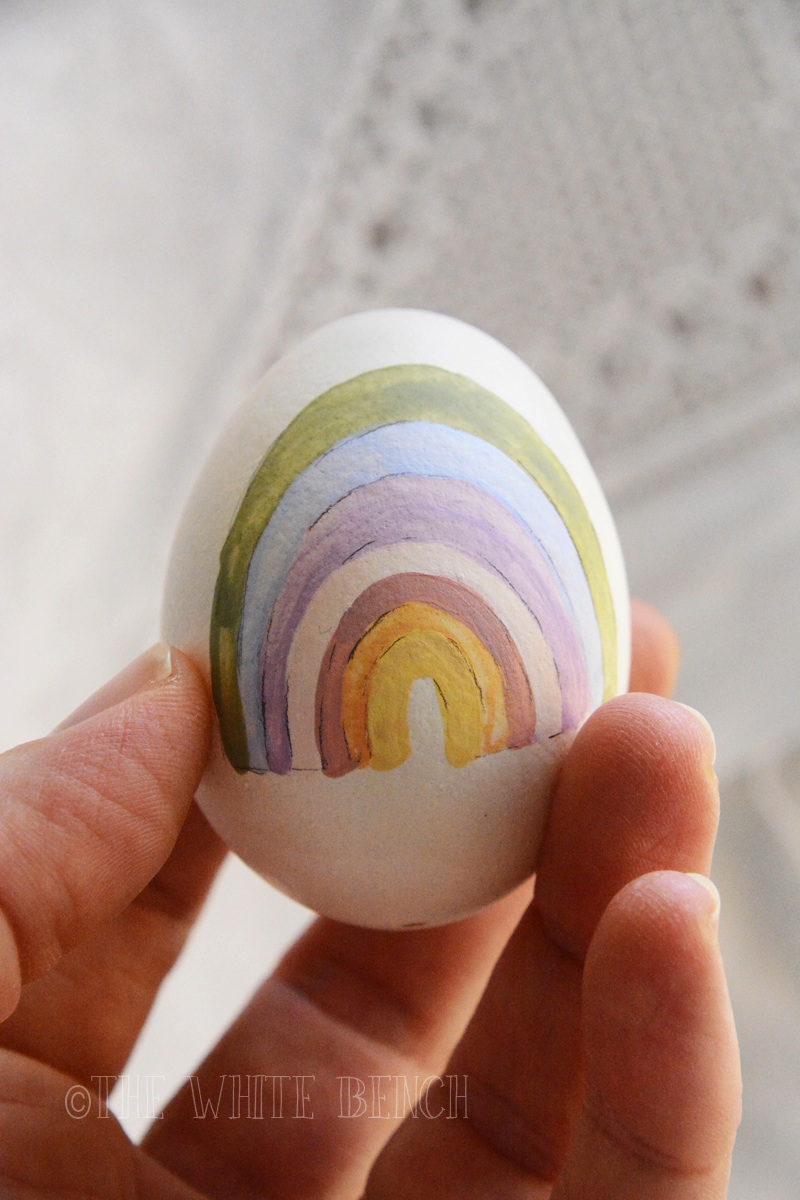
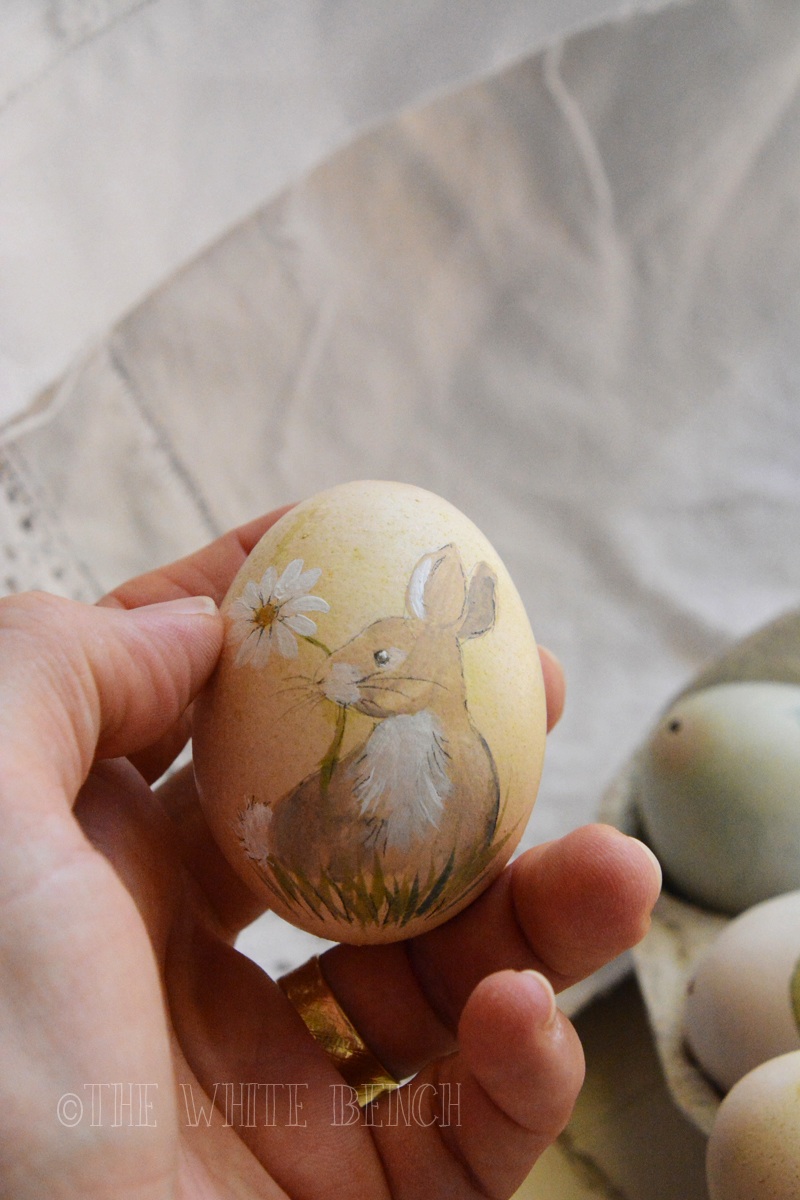
I haven’t spotted bunnies during my daily walks in Nature these past months since last Fall, but it won’t be long! Of course, a bunny was mandatory on my Easter eggs… and I couldn’t help adding a little rainbow, too, given the global happenings this March 2020.
Below you can find the instructions, if you want to make your own eggs this Easter.
TOOLS & SUPPLIES
For this craft you’ll need:
- eggs
- one long needle
- twine
- scissors
- hot glue gun and glue sticks
- acrylic paint
- a paintbrush
- an empty jam jar
- a bowl
- rock salt
- white vinegar
- bicarbonate of soda
- blueberries (a handful)
- one beetroot
- one red onion
- paprika
- four pans (one for each color)
- four cups or little plastic containers
- a strainer
- a piece of paper to cover your table
- a towel or kitchen paper
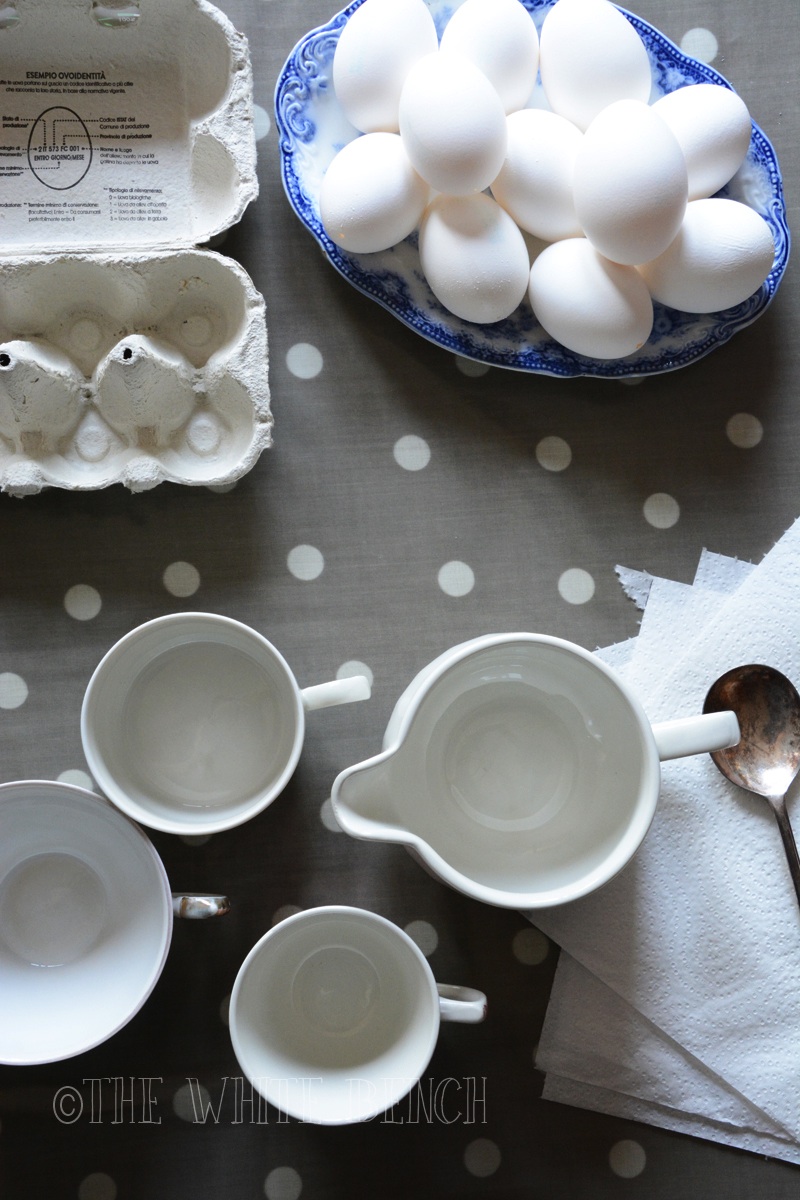
- egg case (the one your eggs came in)
- (some twigs and a pitcher for your Easter tree)
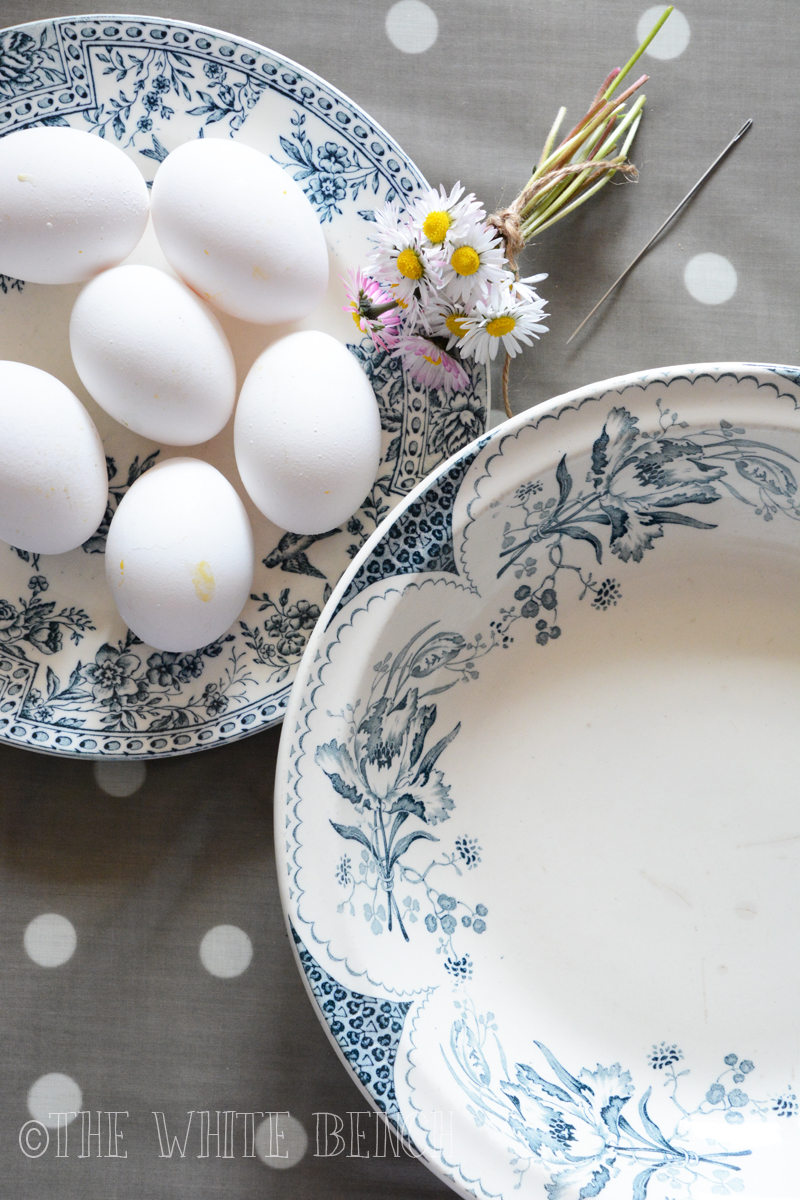
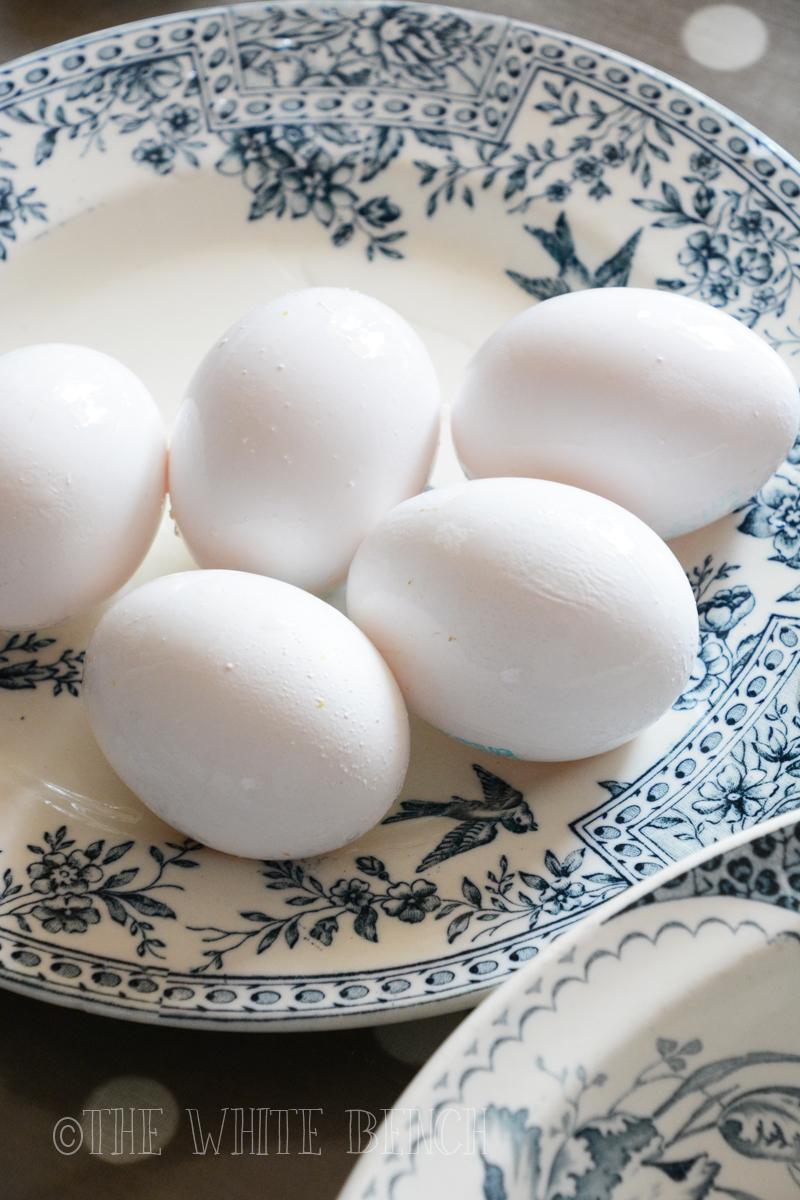

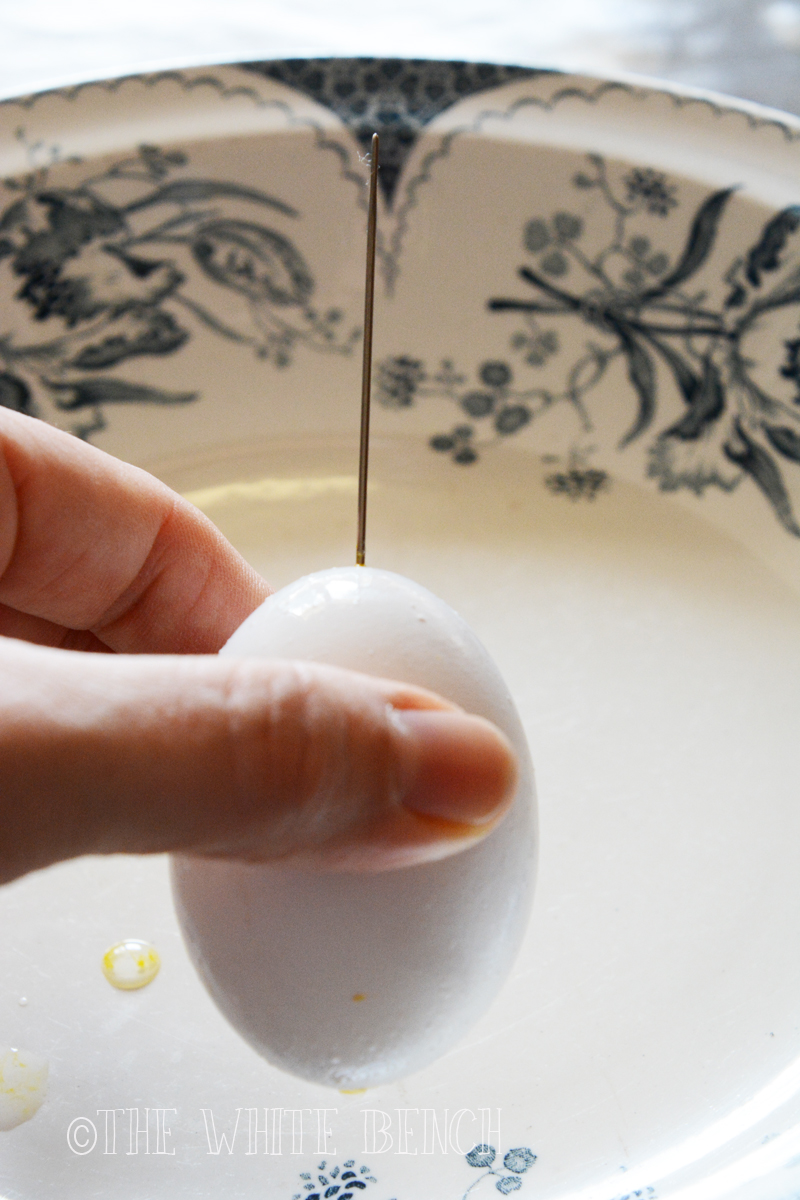
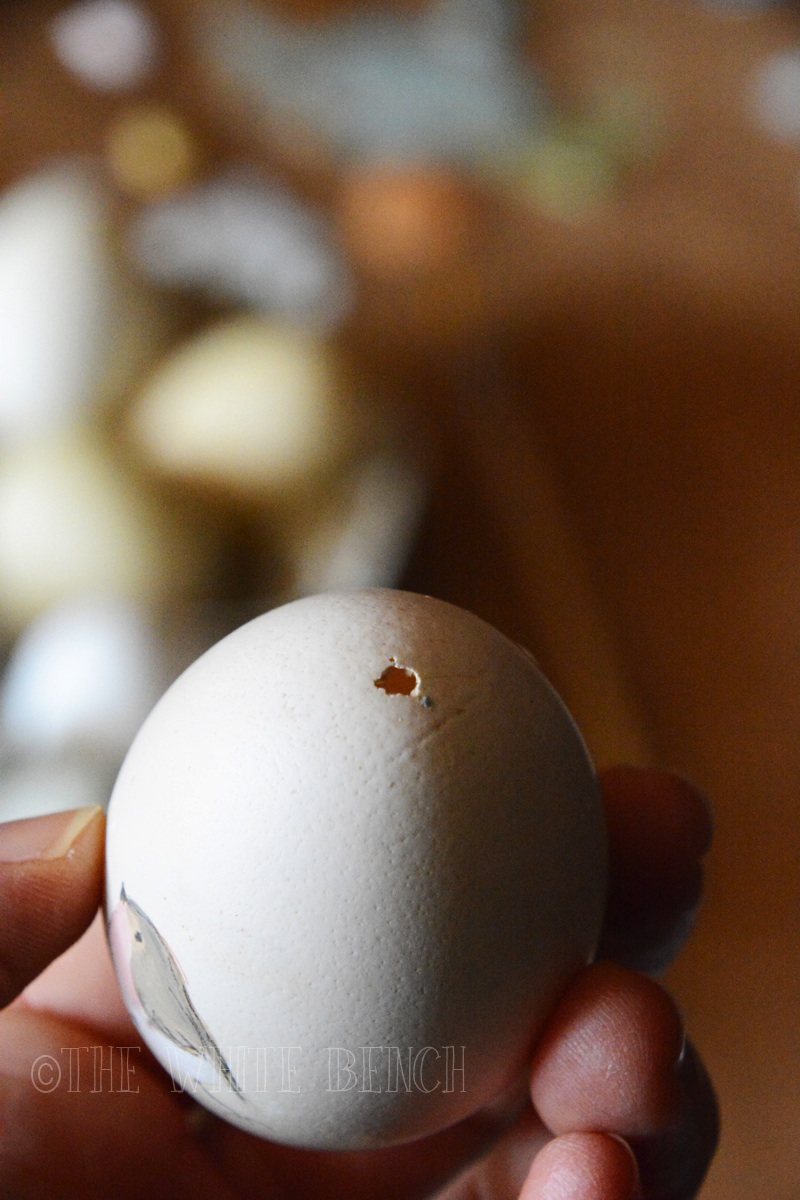
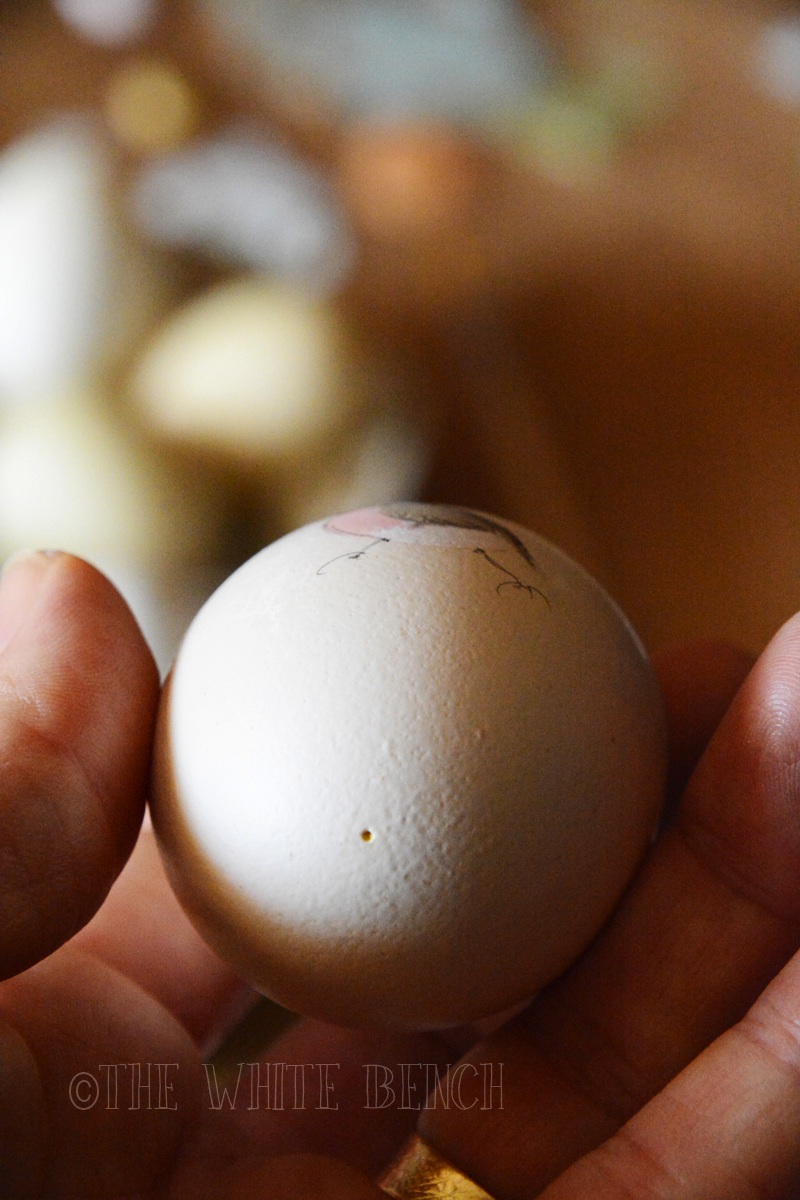
STEP 1: EMPTY YOUR EGGS
1. Wash eggs and needle throughouly in water and bicarbonate.
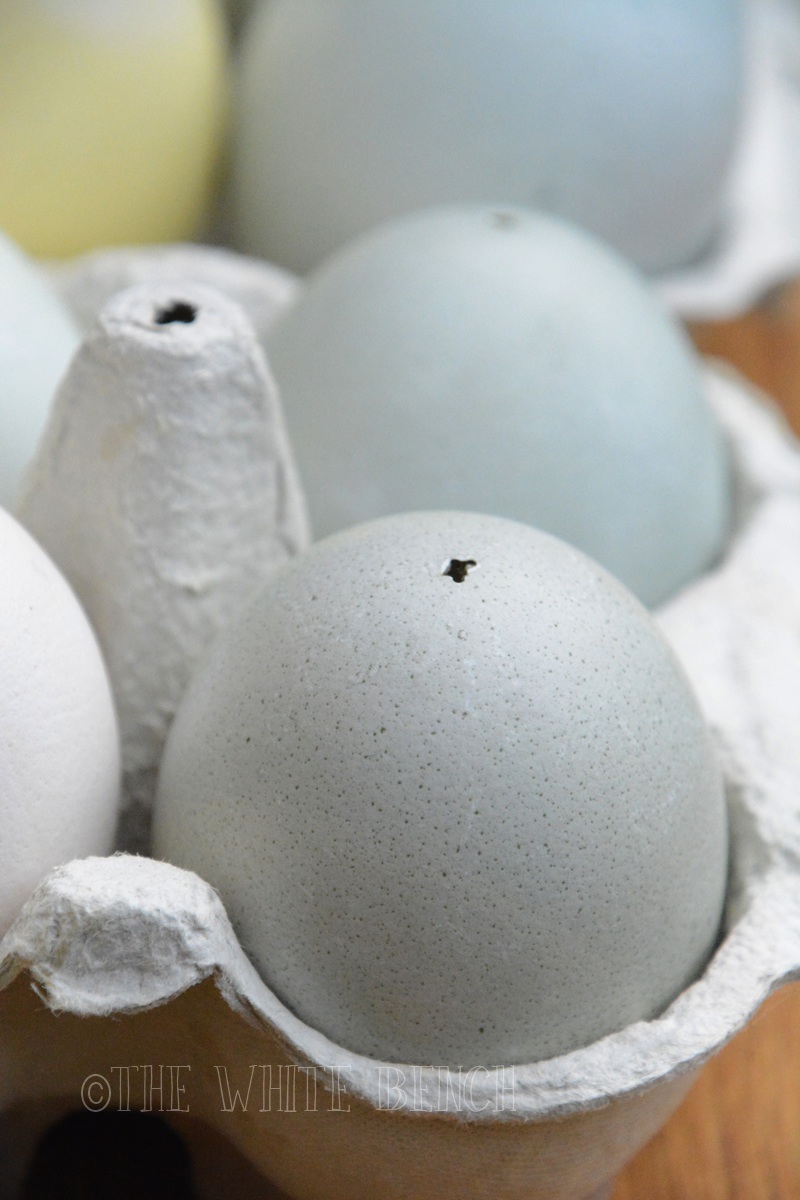
2. Then, keeping a bowl underneath, practice a tiny hole in the bottom part of the egg, keeping it in your hand and just pressing in the needle. You must be delicate and determined at the same time, and you won’t break any egg! :)
3. Turn the egg upside down, and practice a larger hole at the top of your egg (it will be covered with twine).
4. Keeping the larger hole facing down, blow in the tiny hole, until all the content of your egg comes out. This requires a bit of effort, and if you want, you can also enlarge a bit the holes, but remember that the one at the bottom will be visible.
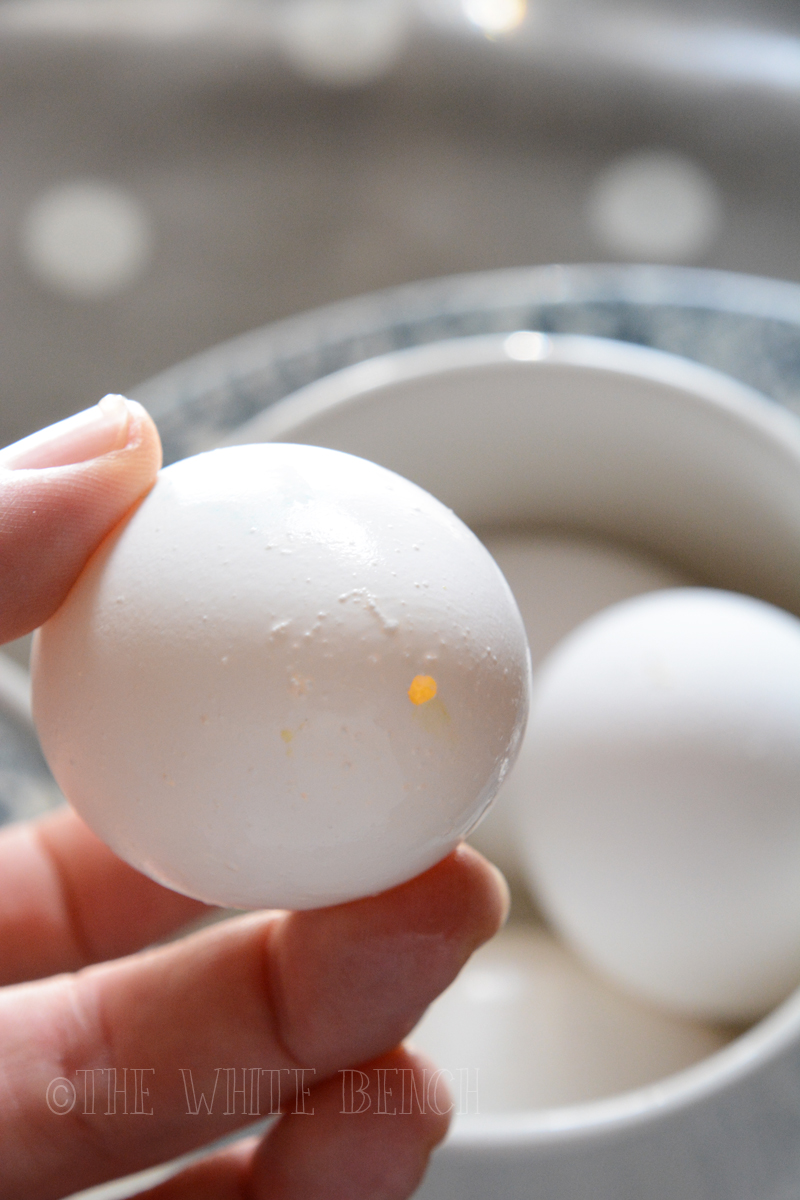
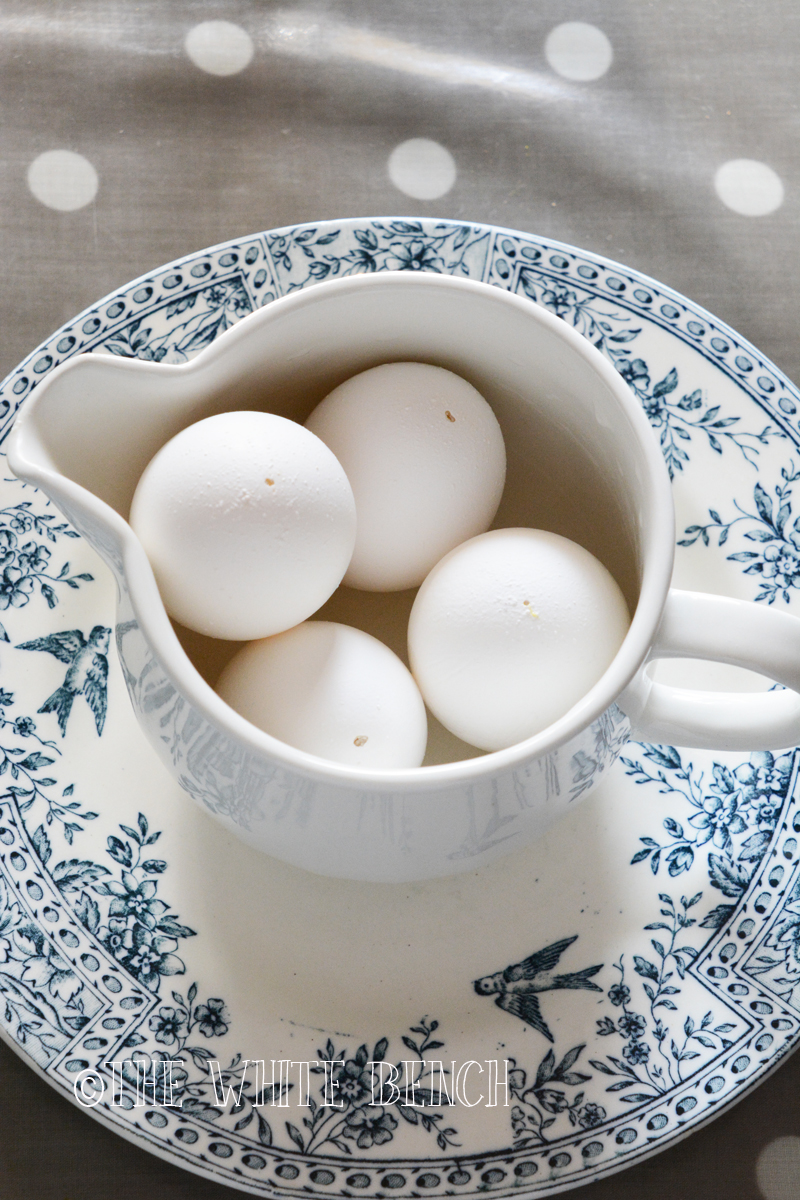
5. Once emptied, wash all the eggs under running water. Put in some dish soap (through the larger hole), shake a bit, and then blow the water out.
6. Allow to dry vertically, placing the eggs in a bowl or other container with the larger hole facing down. Ideally, leave them there overnight before proceeding.
7. Make a yummy frittata with all those eggs, that you can freeze if you want.
STEP 2: NATURAL DYE
Of course you can skip this step, but I want to add it to this post anyway, to document my own process.
I used what I had on hand, without buying additional groceries.
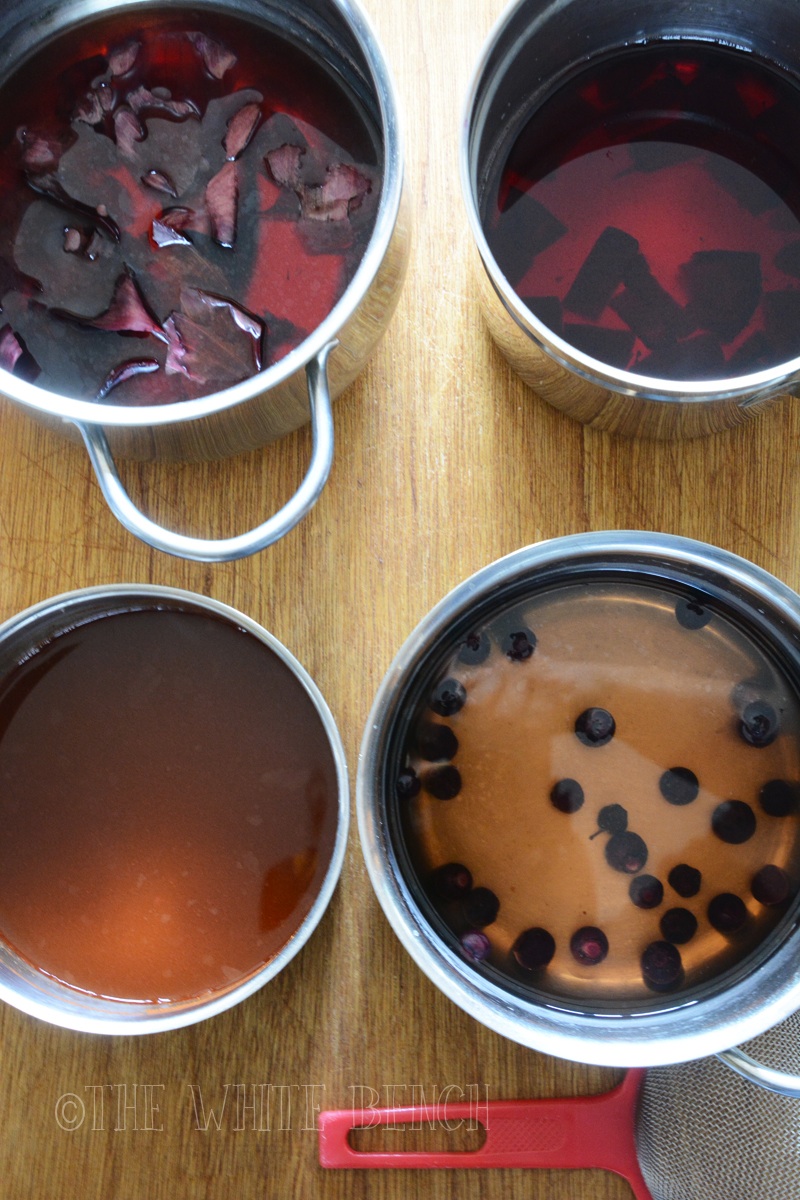
I decided to experiment with blueberries, red onion, beetroots, and paprika. I did not use turmeric on purpose, to not make my eggs too yellow. I wanted muted tones only!
1. Put four pans on the stove (or one for each color, that is), filled with 2 cups of water each and add a teaspoon of salt. Bring to the boil.
2. Place the blueberries, sliced beetroot, two teaspoons of paprika, and the skin of the red onion in the pans.
3. Let boil for about 15 minutes. Mash the blueberries with a fork.
4. Remove from heat, and add a tablespoon of vinegar to each pan. Allow to cool.

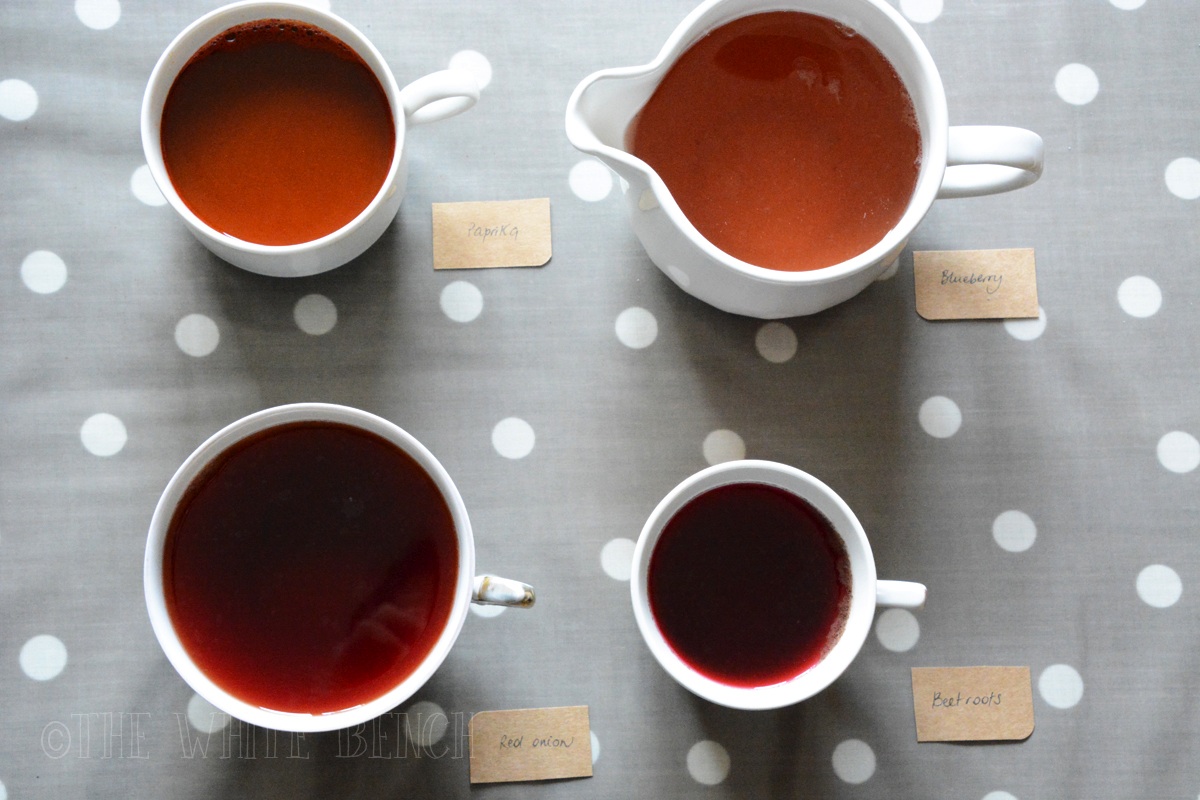
5. With the help of the strainer, filter the tinted water into four cups.
6. Label them.
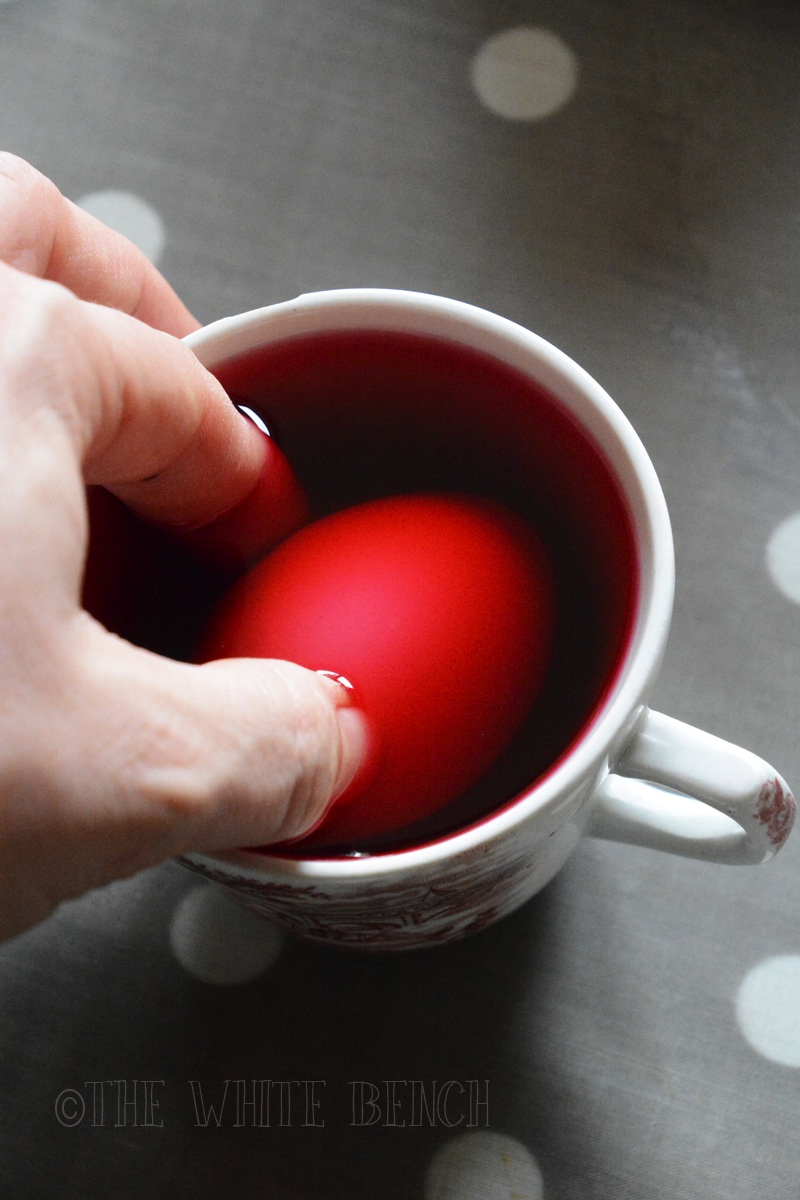
7. Now soak the eggs, one by one. I used my hand (because of course empty eggs will bob at the surface otherwise!), but if you’re concerned about having colored fingers for a few hours, then you’ll need a pair of gloves. I don’t mind, it doesn’t hurt anyone and it’s much more comfortable to do without gloves. I like freedom! :)
You may need to experiment to find out how long you have to soak in order to obtain the desired color. My soaking times have been from around 2-3 minutes to about 10.
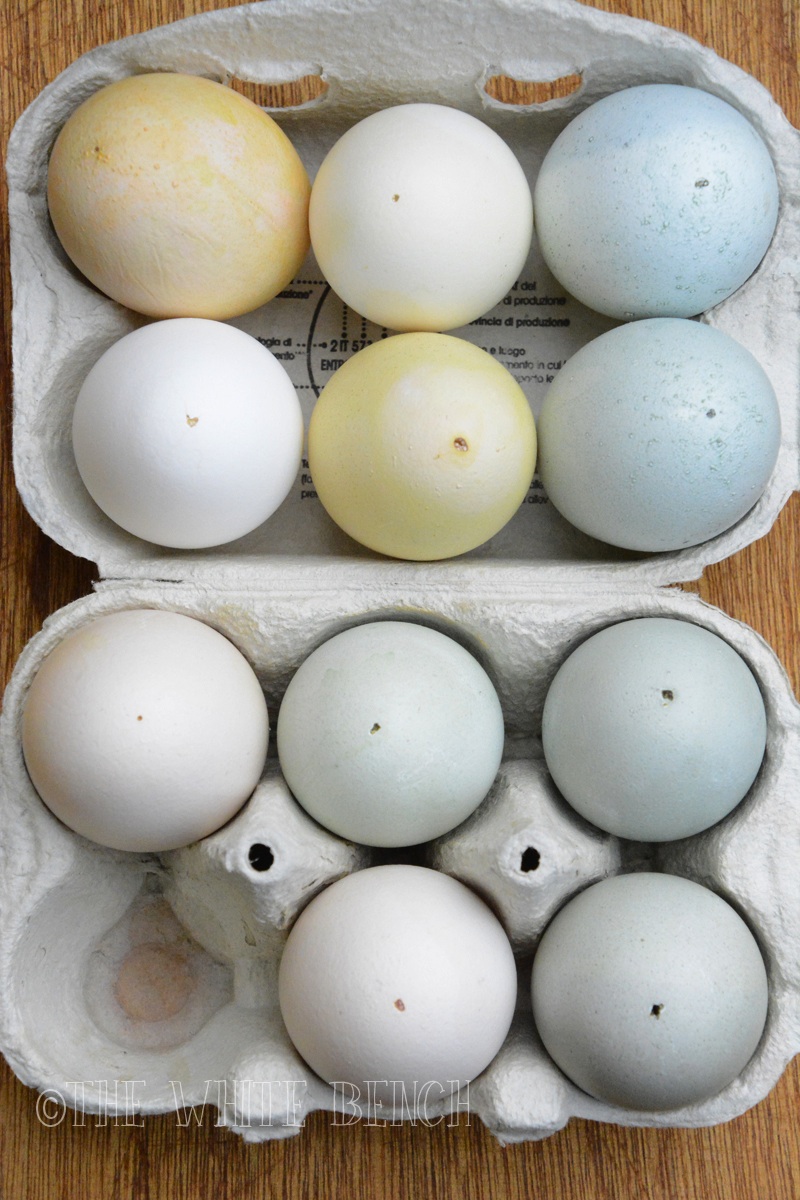
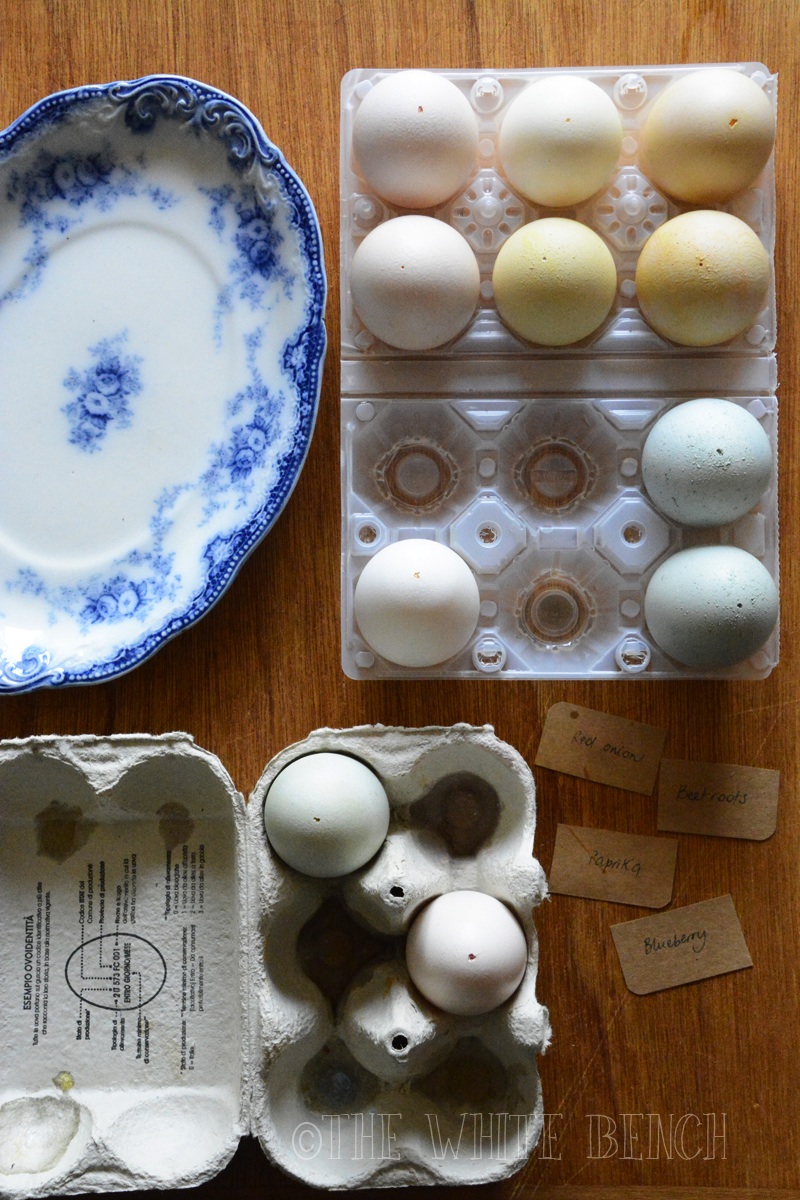
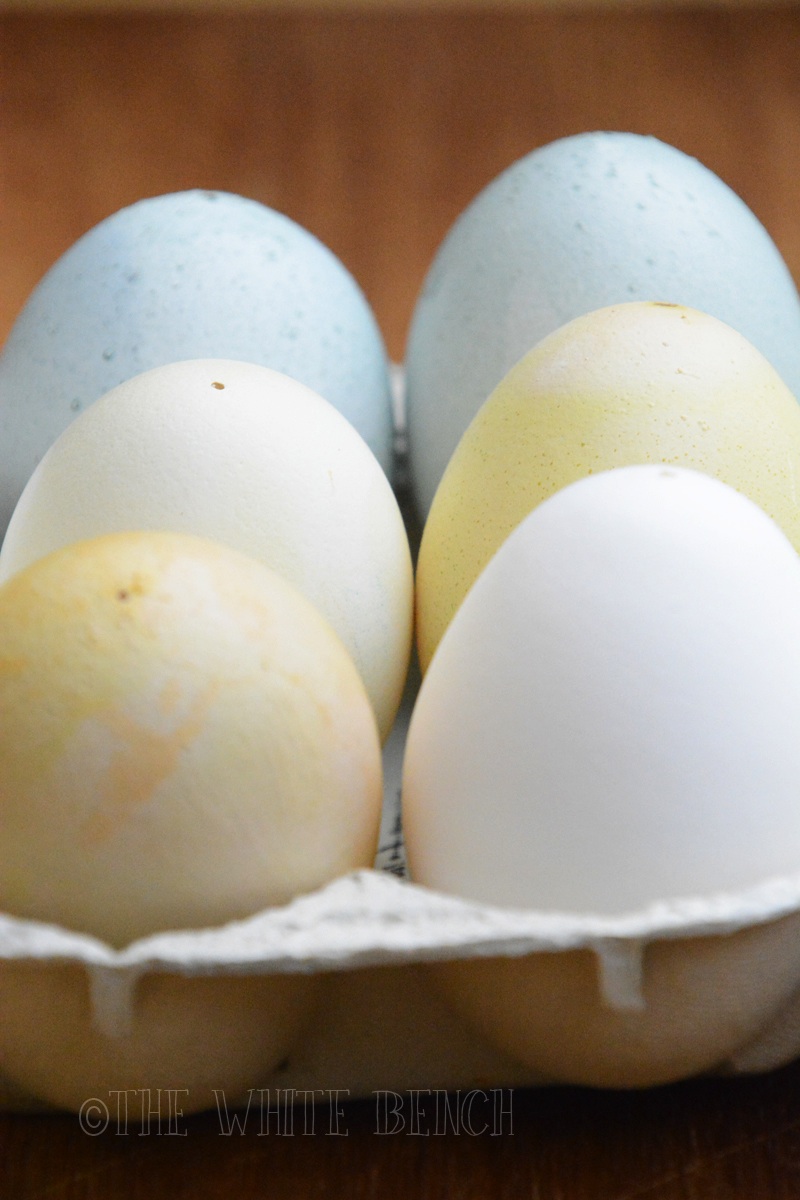
8. Place each egg to dry in the egg case. You can dye again if the color is too pale or you want a different color (for example, to obtain green I soaked twice in different dyes).
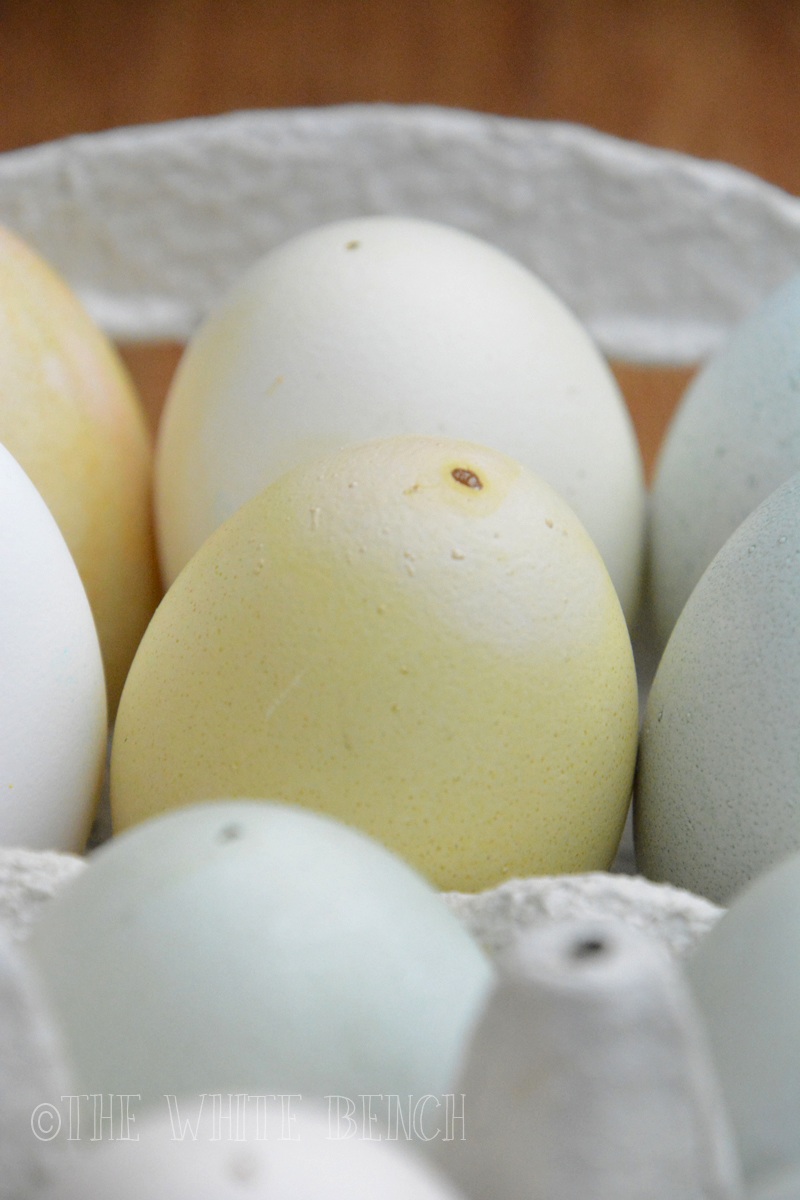
I did not obtain the colors I was thinking when I started, but I’m totally happy with what I ended up with!
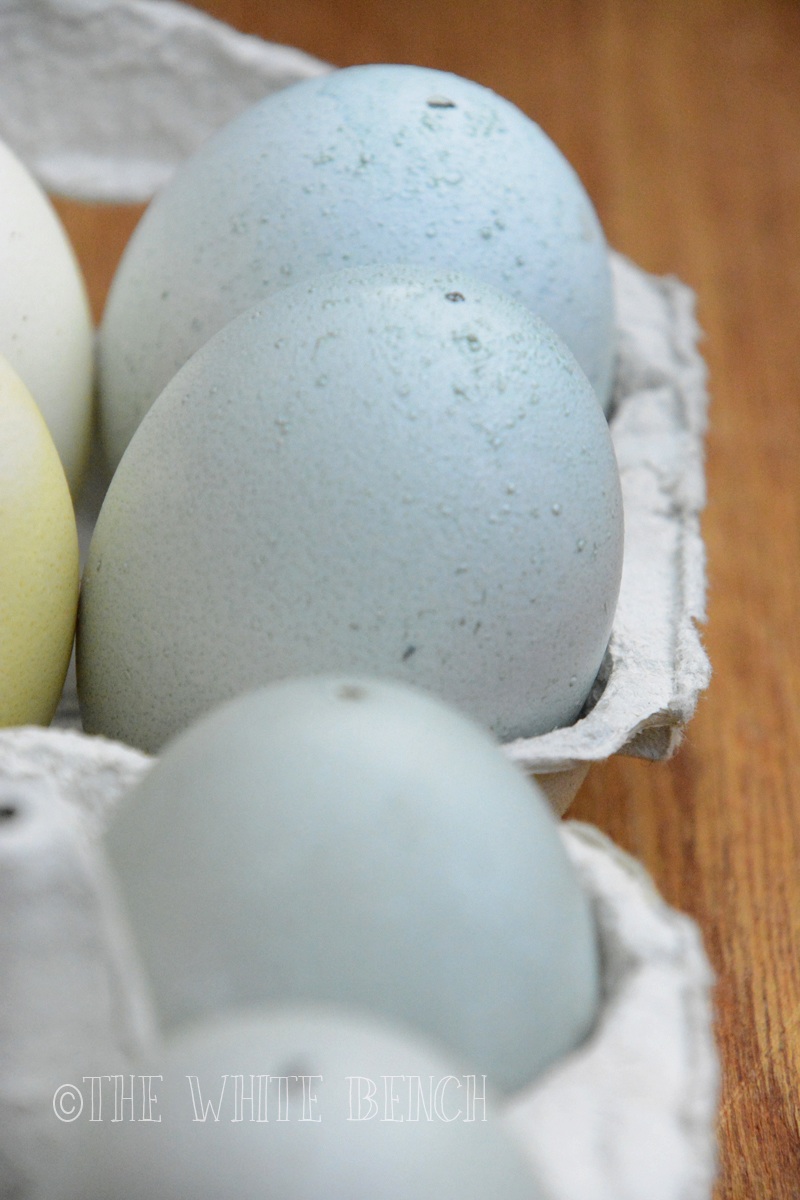
Blueberries gave me a wonderful muted blue, but I had to insist. The soaking time was approx 7-10 minutes in this case! And I have had to repeat twice in some cases, as the color did not appear.
Red onion gave me a flesh/cream tone I loved so much! I thought it was some sort of pink or purple, and instead, this is what I eneded up with!
Paprika imparted a yellow shade to my eggs. If you want muted colors, don’t soak for too long! A few minutes are enough.
Beetroots created a very pale pink, I didn’t expect. I thought it was much stronger, maybe I have to mash the beetroot next time, or use two or three instead of one.
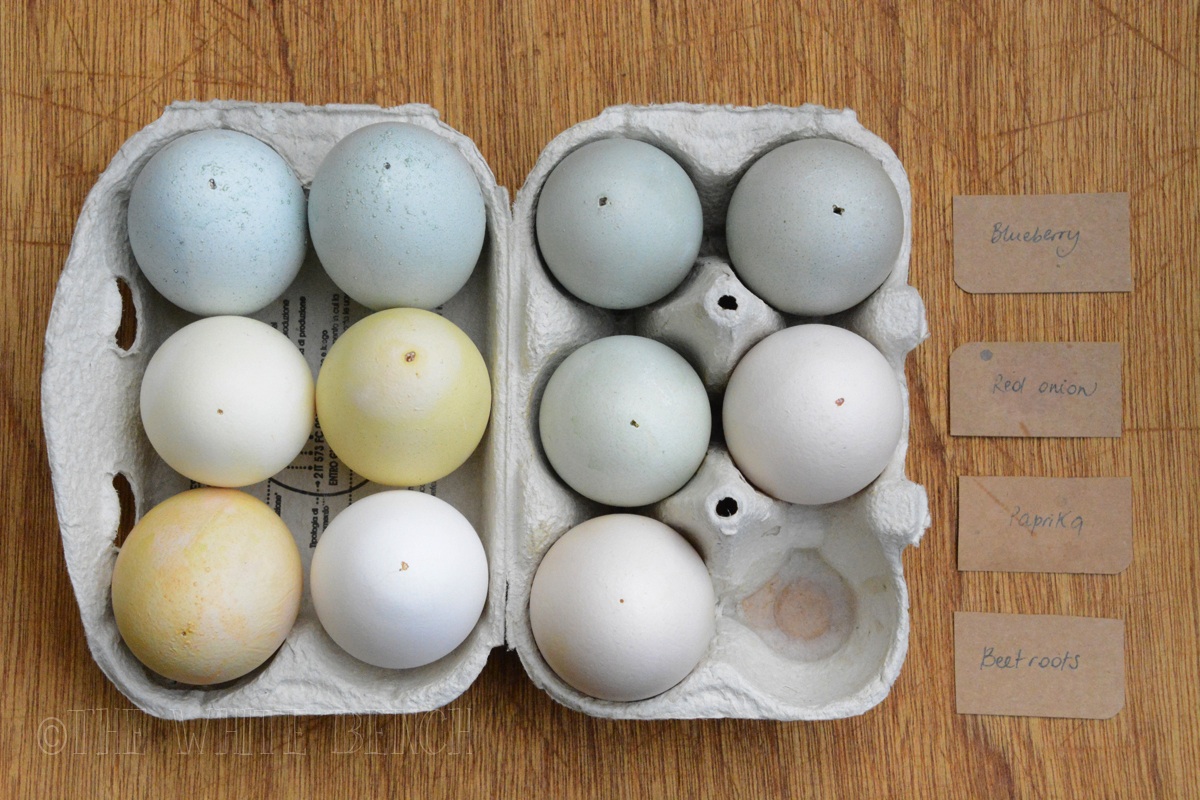
To summarize:
Pale Blue: blueberries
Yellow: paprika
Pale Pink: beetroots
Cream: red onion
Duck Egg Blue (green-ish blue): red onion + dry + blueberries
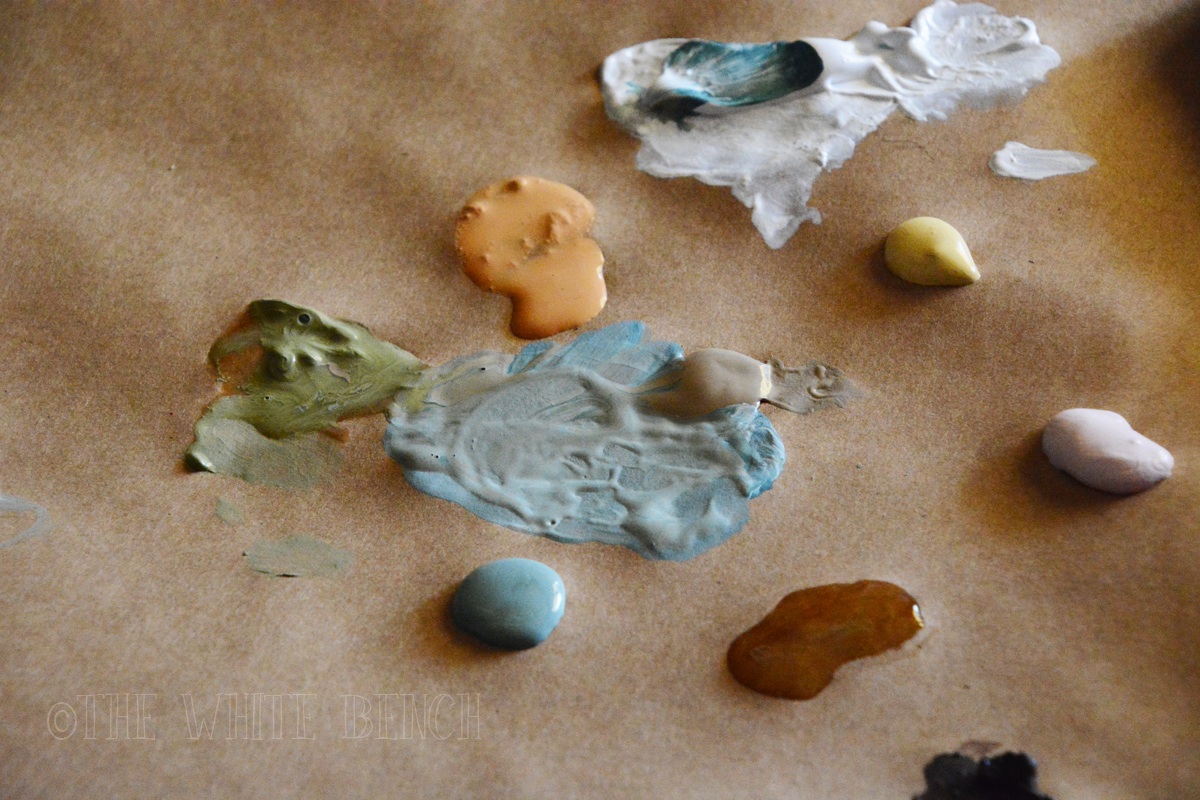
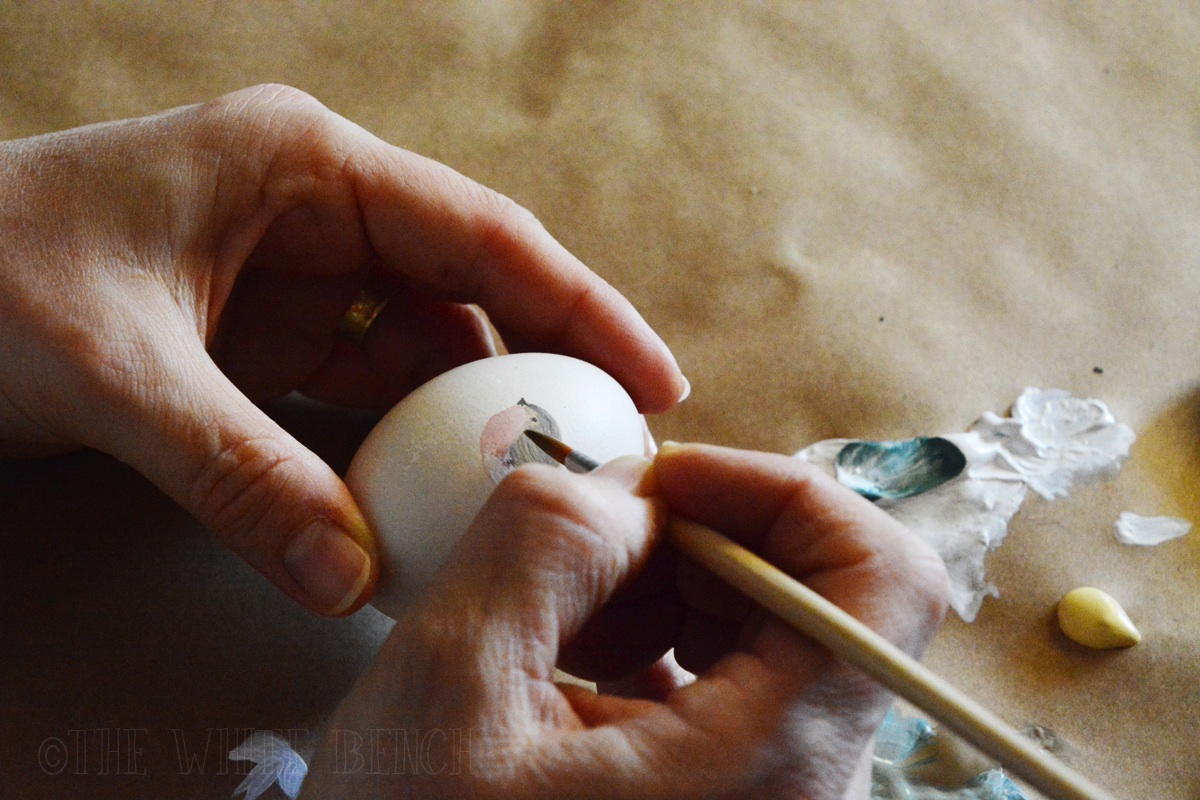
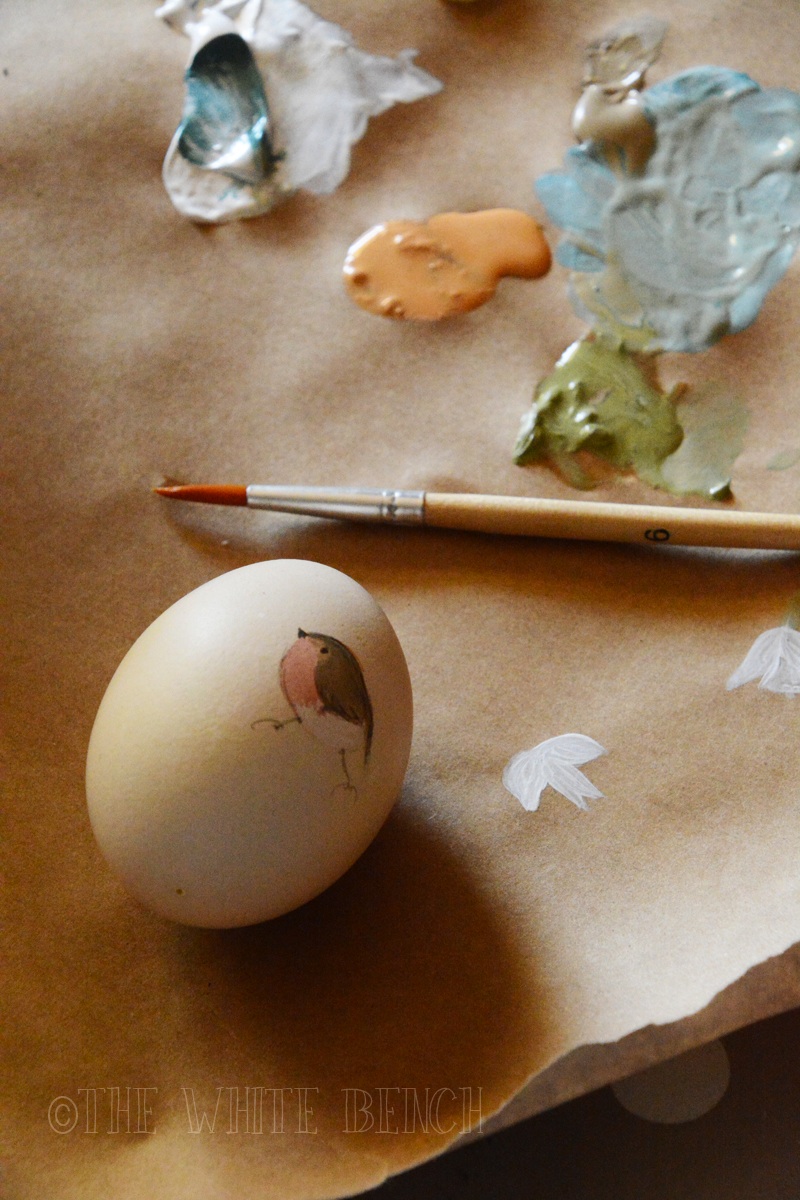
STEP 3: PAINT THE EGGS
When your eggs are completely dry, you can paint them.
I used acrylics, and painted free hand directly on the eggs, to then use the pencil to finish off and add details.
If you are not confident enough, draw your design first, and then paint it.
You can place the paint on a disposable plate, or a simple piece of Kraft paper/sheet of paper.
Let the eggs dry well before proceeding.


STEP 4: ATTACH STRING & HANG
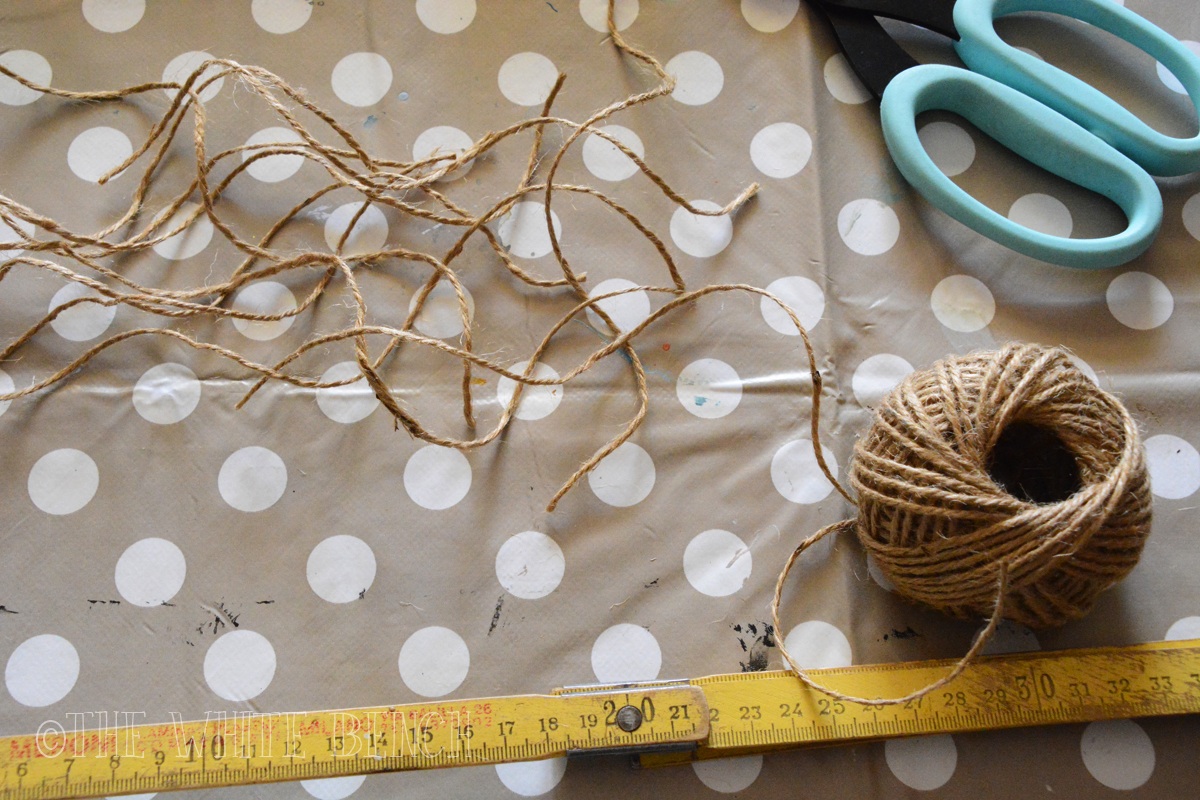
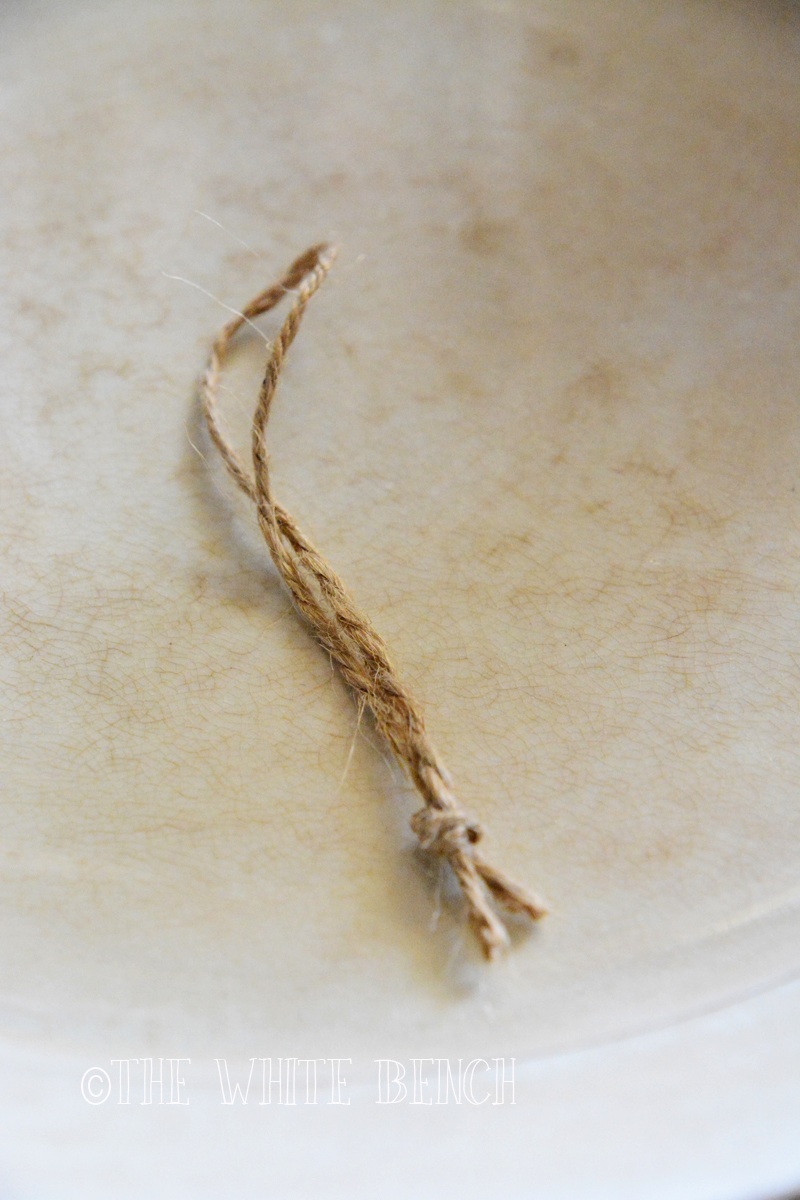
1. Cut pieces of string with the help of a ruler.
2. Then tie a knot.
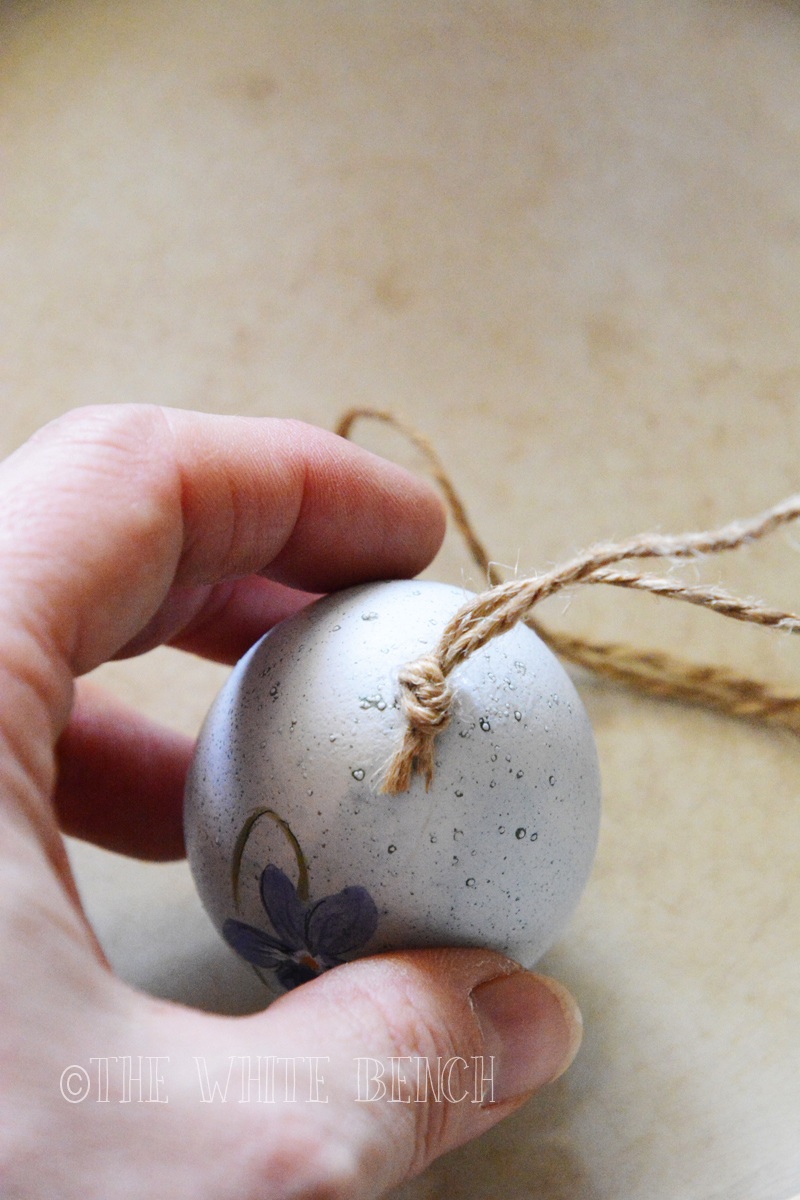
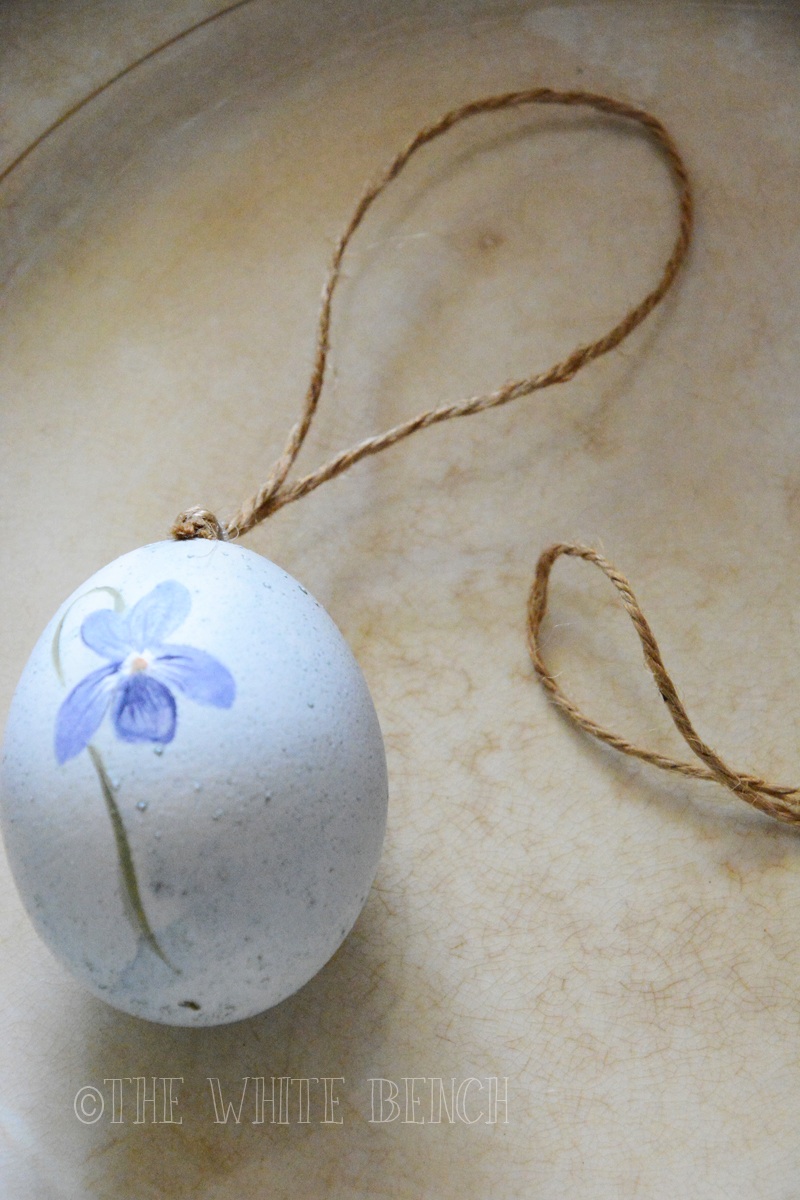
3. Attach to the top of your eggs, covering the hole, with a dash of hot glue.
3. When dry, remove any ugly glue cobwebs.
4. Hang on your Easter tree.
A little final note: this craft from start to finish is long. So I would recommend not trying to do it all at once, if you don’t want to end up exhausted or frustrated! I’d say the best is to do it in four days: one day empty the eggs, one day dye, one day paint, one day attach the string and put your tree together.
Hope you’ll love this Easter craft as much as I do!!
Until next time,
xoxo,

Watch my vlogs and subscribe to my Substack newsletter for free to get it in your inbox.
0 Comments